Introduction
IMPORTANT NOTES, READ BEFORE INSTALLATION
- DO NOT couple parts of the stock linkage to the Elka Dual-Linkage
- DO NOT install the stock shock absorber with the Elka Dual-Linkage
- Any of the above will lead to failure of the linkage system and could cause serious injuries
- Use the Elka Dual-Linkage exclusively with the Elka rear shock absorber it was designed for
-
-
Remove the stock linkage from the vehicle. (See your Yamaha Service Manual for detailed instructions).
-
Remove the sleeves and dust caps from your stock linkage and inspect them to make sure they are adequate for reuse.
-
If the sleeves or dust caps are worn, they will need to be replaced prior to installation in the Elka linkage. See your dealership.
-
-
-
In a clean environment, generously apply grease to the linkage’s bearings and the sleeves.
-
The linkage bearings must be greased prior to installation. This is an important step to ensure the proper functioning of the linkage system. Ungreased bearings can lead to premature failing and will significantly reduce the linkage’s performance.
-
Apply anti-seize compound to the linkage bolt holes and the rear bolt.
-
Install the sleeves and dust caps on the Elka linkage.
-
-
-
It is best to install the shock on the ATV before installing the Elka Dual-Linkage. You might have to modify, shim or remove your skidplate to allow proper clearance for the linkage.
-
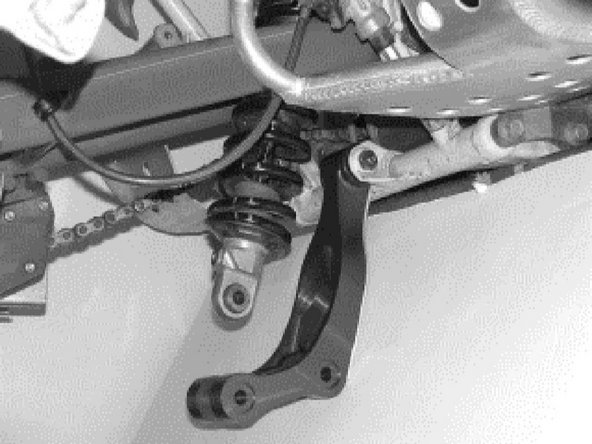
Install the red part of the Dual-Linkage on the ATV.
-
-
-
Attach the bottom of the shock (eyelet) to the linkage.
-
-
-
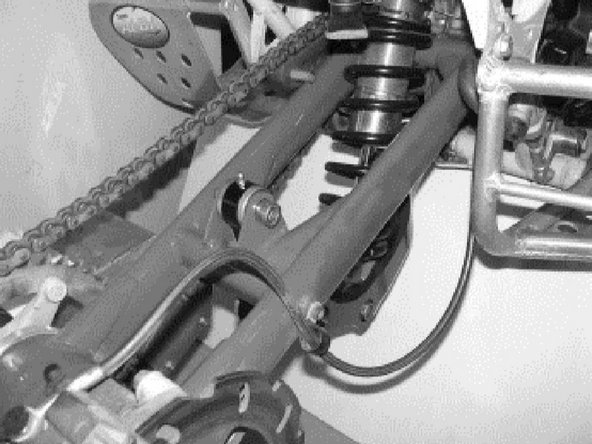
Install the black part of the Dual-Linkage and attach it to the swingarm.
-
-
-
Attach the black part to the red part of the linkage.
-
-
-
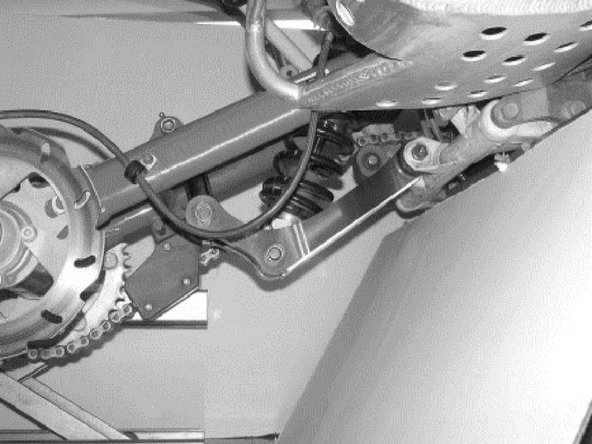
Tighten the bolts properly according to the torque specifications from the manufacturer.
-
-
-
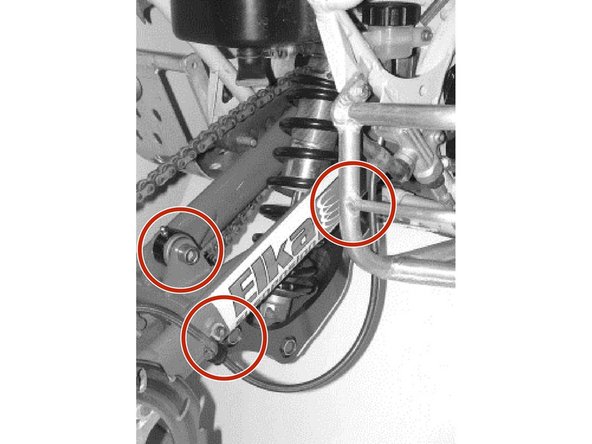
Grease the front pivot bolt and the black part of the Dual-Linkage using a grease gun on the zerks fittings.
-
Re-adjust your ride-height. Installation is complete.
-
IMPORTANT: CALIBRATION AND MAINTENANCE PROCEDURES The ATV’s ride height will be altered after installing the Elka Dual-Linkage. It is important to re-adjust the ride-height porperly before riding. Refer to your Elka Suspension shock absorber’s owner manual for detailed procedures for seting the ride-height.
-
Follow the same maintenance procedures as for your stock linkage (refer to the manufacturer’s owner manual). Inspect the linkage and bearings for wear or damage before each ride.
-