
-
-
Lift the vehicle using a jack or stand so that the wheels are off the ground. Refer to your vehicle's owner manual for specific instructions on how to remove the stock shocks. Keep you original bolts to re-use when installing your new Elka shocks.
-
-
-
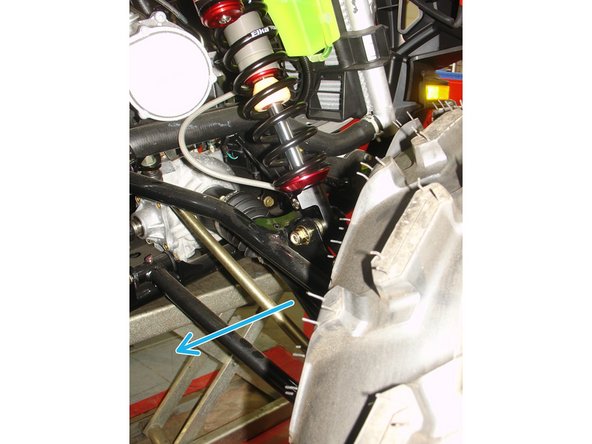
Install the new Elka shocks with the reservoir (on Stage 3,4,5) or Schaeder nitrogen valve (on Stage 1,2) at the top and oriented towards the rear of the vehicle as indicated by the blue arrow on the photos.
-
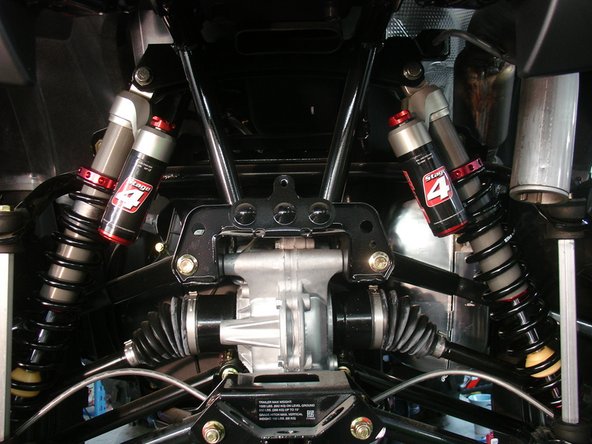
The first photo shows the left side of the vehicle. The piggyback reservoir on the left shock is at a 90 degrees angle with the upper mounting bushings.
-
The second photo shocks the right side of the vehicle. The piggyback reservoir on the right shock is at a 45 degrees angle with the upper mounting bushings.
-
-
-
On Stage 2, Stage 4 and Stage 5 models, the lower shock eyelets should be installed with the rebound adjuster oriented towards the rear of the vehicle as shown by the blue arrow on the photo (right side shown). If needed, you can turn the lower eyelet to orient properly. This will facilitate access to the adjuster.
-
-
-
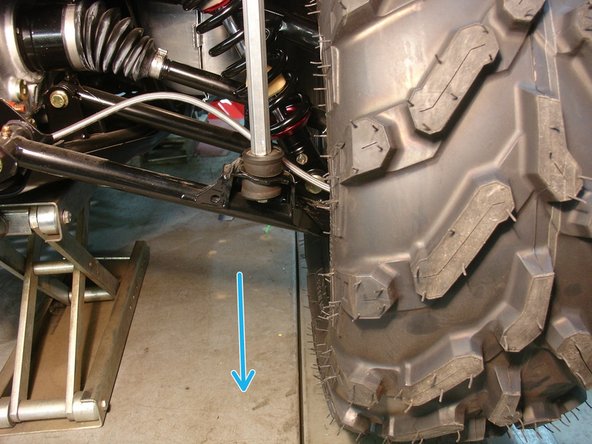
Install the new Elka rear shocks with the piggyback reservoir at the top and oriented towards the rear of the vehicle and pointed slightly inside the vehicle.
-
-
-
On Stage 2, Stage 4 and Stage 5 models the rebound adjuster located on lower eyelet of the shocks should be oriented towards the rear of the vehicle, as indicated by the blue arrow on the photo.
-
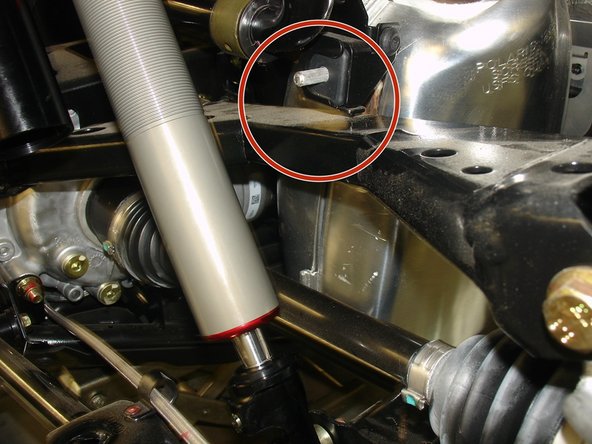
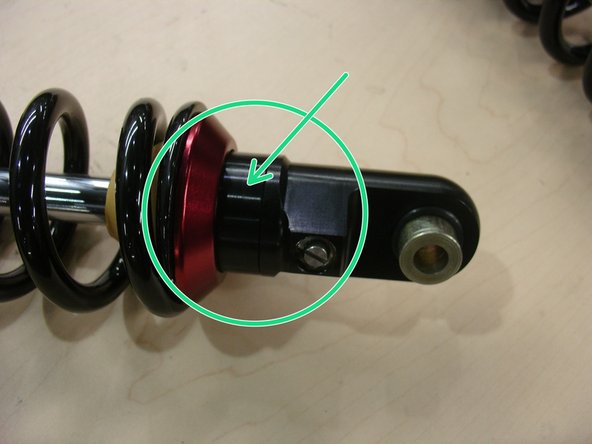
IMPORTANT NOTE: The rear shocks for this vehicle model are equipped with 15mm stroke limiters to restrict the wheel travel and prevent contact between the exhaust bracket and the right rear a-arm under full compression of the suspension (see red circle on photo 2).
-
If using an aftermarket exhaust system that requires or allow removal of the stock exhaust bracket, the user can remove those stroke limiters to gain an additional 1-1/8" of wheel travel (see green arrow on photo 3). You might need to reduce spring preload or completely remove the spring(s) to remove the stroke limiter.
-
Note: We highly recommend a tire pressure of ± 7 psi.
-


Cancel: I did not complete this guide.
One other person completed this guide.
