-
-
NOTE: All steps must be in accordance with the manufacturer’s service manual.
-
Secure the vehicule with a jack with corresponding weight lifting capabilities.
-
Lift the vehicule in such a way that the front and rear wheels are not touching the ground. This will remove the weight on the shocks. If you don’t have a lift strong and stable enough, do the front and rear end separately for safety issues.
-
-
-
Remove the top and bottom shock bolts and then remove the stock shock.
-
-
-
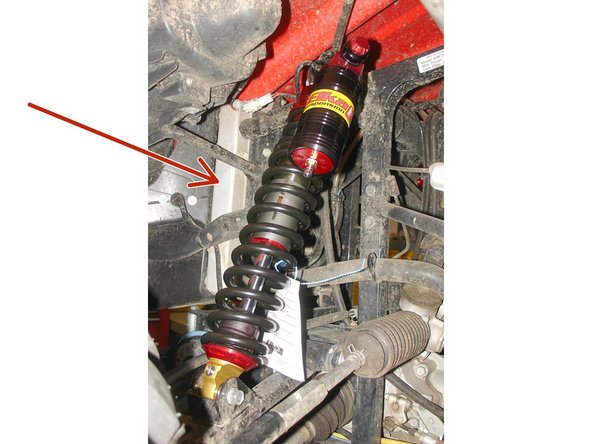
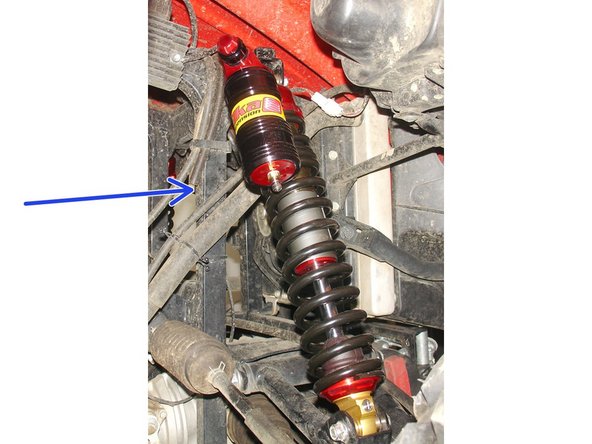
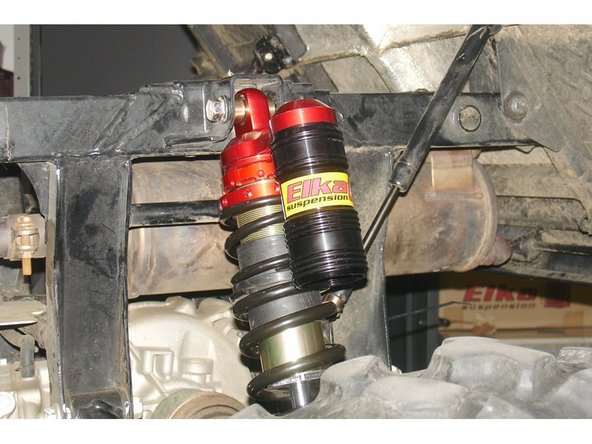
Install the Elka shock absorbers bolting the top mount first with the piggyback reservoirs towards the rear with the compression adjustments facing towards the outside of the vehicule.
-
Driver side
-
Passenger side
-
Tighten the top and bottom shock bolts to the proper manufacturer’s torque specifications.
-
Refer to Elka owner’s manual to set the ride height and for adjustment procedure.
-
Installation is complete.
-
-
-
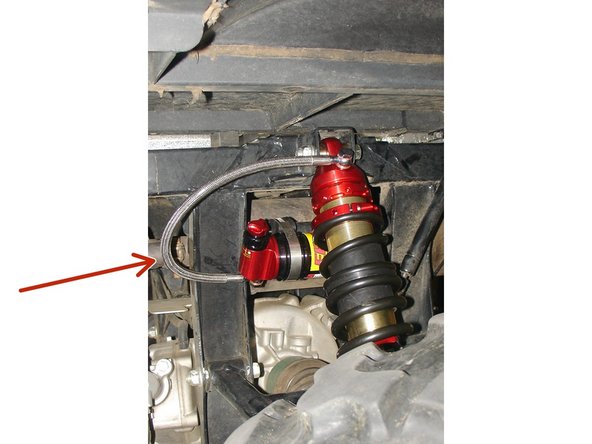
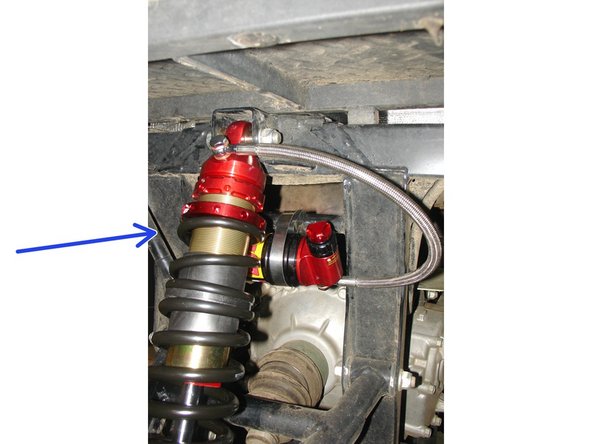
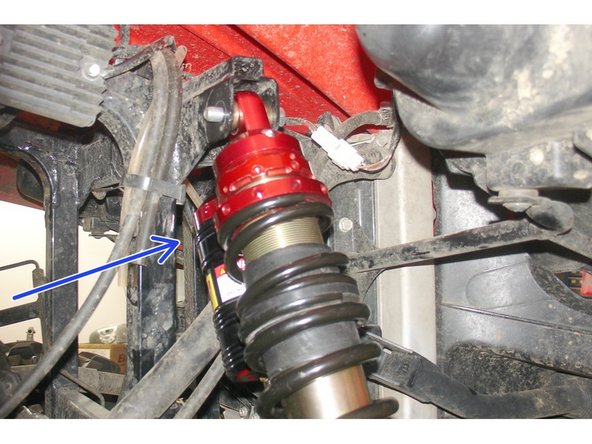
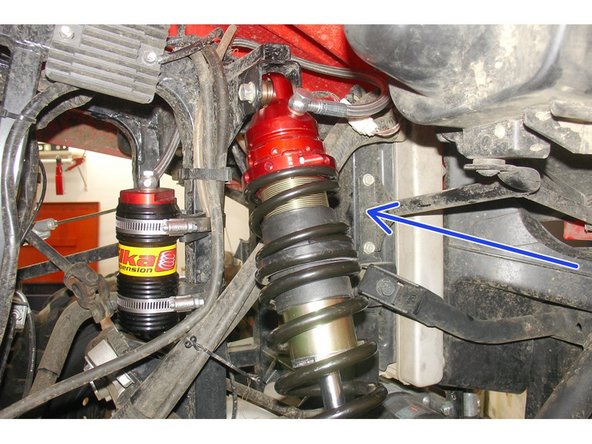
Install the Elka shock absorbers bolting the top mount first with the banjo bolt (connected to the shock head) facing towards the outside of the vehicule. Orient the hose towards the rear of the vehicule. Make sure to keep the driver’s side reservoir away from the exhaust pipe.
-
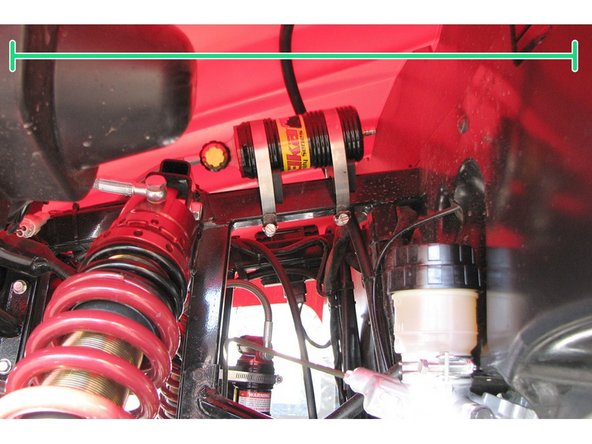
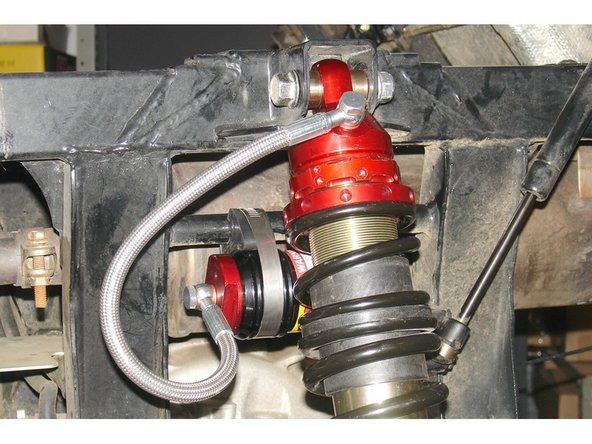
Install the reservoir with the banjo bolt (connected to the reservoir) facing towards the bottom of the vehicule. The reservoir must be attached to the frame using the provided rubber mounts and metal collars. Do not over tighten the metal collars on the reservoir (torque to 6 lbs-in). Make sure to route the hose according to the pictures.
-
The compression adjustment knobs should be facing the top of the vehicule for convenient access.
-
Tighten the top and bottom shock bolts to the proper manufacturer’s torque specifications.
-
Driver side
-
Passenger side
-
Refer to Elka owner’s manual to set the ride height and for adjustment procedure.
-
Installation is complete.
-
-
-
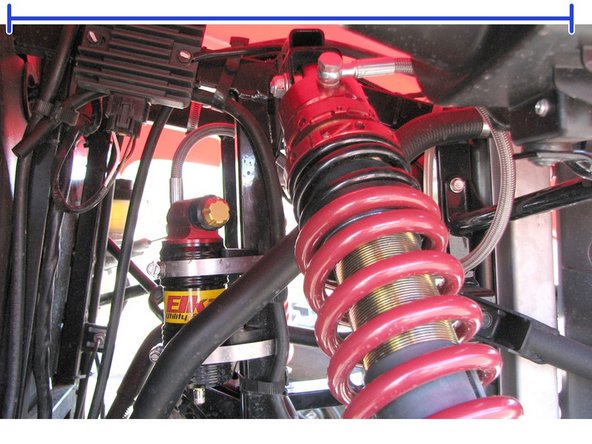
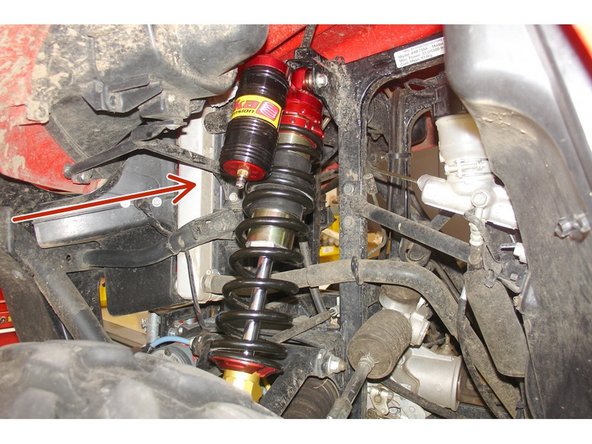
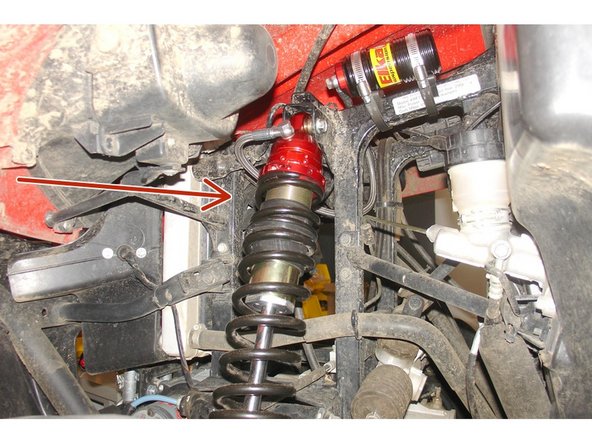
Install the Elka shock absorbers bolting the top mount first with the banjo bolt (connected to the shock head) facing towards the outside of the vehicule. Orient the hose towards the front of the vehicule.
-
Install the reservoir with the banjo bolt (connected to the reservoir) facing towards the inside of the vehicule. The reservoir must be attached to the frame using the provided rubber mounts and metal collars. Do not over tighten the metal collars on the reservoir (torque to 6 lbs-in). Make sure to route the hose according to the pictures.
-
The compression adjustment knobs should be facing the outside of the vehicule.
-
Tighten the top and bottom shock bolts to the proper manufacturer’s torque specifications.
-
Refer to Elka owner’s manual to set the ride height and for adjustment procedure.
-
Driver side
-
Passenger side
-
Installation is complete.
-
-
-
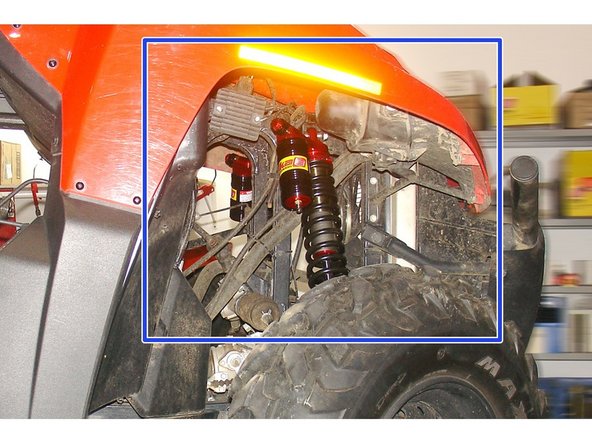
Install the Elka shock absorbers bolting the top mount first with the piggyback reservoirs towards the outside of the vehicule.
-
Tighten the top and bottom shock bolts to the proper manufacturer’s torque specifications.
-
Refer to Elka owner’s manual to set the ride height and for adjustment procedure.
-
Installation is complete.
-
NOTE: If you use aftermarket A-arms, be sure that the piggyback reservoirs won’t interfere with the light housing, so verify the angle gain. You can mount the front piggyback opposite for more clearance between the piggyback reservoir and the light housing. In this case, the piggyback reservoirs will face towards the inside of the vehicule.
-
Driver side
-
Passenger side
-
-
-
Install the Elka shock absorbers bolting the top mount first with the piggyback reservoirs towards the outside of the vehicule.
-
Tighten the top and bottom shock bolts to the proper manufacturer’s torque specifications.
-
Refer to Elka owner’s manual to set the ride height and for adjustment procedure.
-
Installation is complete.
-
-
-
Install the Elka shock absorbers bolting the top mount first with the banjo bolt (connected to the shock head) facing towards the outside of the vehicule. Orient the hose towards the front of the vehicule.
-
Install the reservoir with the banjo bolt (connected to the reservoir) facing towards the front of the vehicule.
-
On the passenger’s side, the banjo bolt (connected to the reservoir) should face towards the top of the vehicule. The reservoir must be attached to the frame using the provided rubber mounts and metal collars. Do not over tighten the metal collars on the reservoir (torque to 6 lbs-in).
-
Make sure to route the hose according to the photos.
-
Tighten the top and bottom shock bolts to the proper manufacturer’s torque specifications.
-
Refer to Elka owner’s manual to set the ride height and for adjustment procedure.
-
Installation is complete.
-
-
-
Install the Elka shock absorbers bolting the top mount first with the banjo bolt (connected to the shock head) facing towards the outside of the vehicule. Orient the hose towards the rear of the vehicule.
-
Install the reservoir with the banjo bolt (connected to the reservoir) facing towards the rear of the vehicule. The reservoir must be attached to the frame using the provided rubber mounts and metal collars. Do not over tighten the metal collars on the reservoir (torque to 6 lbs-in).
-
Make sure to route the hose according to the photos.
-
Tighten the top and bottom shock bolts to the proper manufacturer’s torque specifications.
-
Refer to Elka owner’s manual to set the ride height and for adjustment procedure.
-
Installation is complete.
-