Elka Suspension
LEADERS IN POWERSPORTS SHOCK ABSORBERS | 1-800-557-0552

Honda trx 90 1993- newer

Major VersionM

by Pierre-Yves Deneault

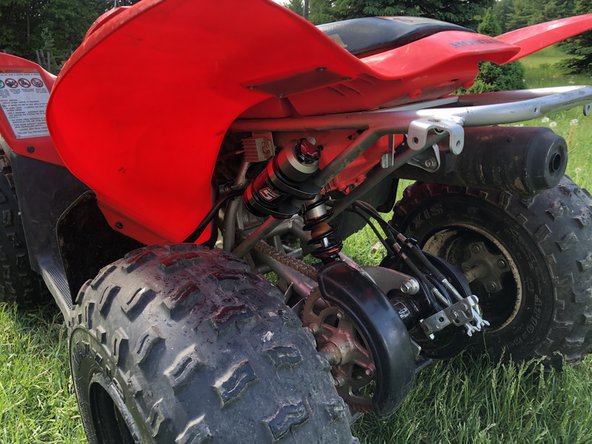
    • Lift the vehicle using a jack or stand so that the wheels are off the ground. Refer to your vehicle's owner manual for specific instructions on how to remove the stock shocks. Keep your original bolts to re-use when installing your new Elka shocks.

  1. Install the front new Elka shocks with the reservoir ( on Stage 3-4-5 ) or Schraeder nitrogen valve ( on Stage 1-2 ) at the top of vehicle. ( left side shown ).  The orientation of the reservoir need to look back (blue Arrow) On Stage 2, Stage 4 and Stage 5 models, the lower shock eyelets should be installed with the rebound adjuster oriented center of the vehicle as shown by the Yellow Arrow on the photo . If needed, you can turn the lower eyelet to orient properly. On Stage 2, Stage 4 and Stage 5 models, the lower shock eyelets should be installed with the rebound adjuster oriented center of the vehicle as shown by the Yellow Arrow on the photo . If needed, you can turn the lower eyelet to orient properly.
    • Install the front new Elka shocks with the reservoir ( on Stage 3-4-5 ) or Schraeder nitrogen valve ( on Stage 1-2 ) at the top of vehicle. ( left side shown ). The orientation of the reservoir need to look back (blue Arrow)

    • On Stage 2, Stage 4 and Stage 5 models, the lower shock eyelets should be installed with the rebound adjuster oriented center of the vehicle as shown by the Yellow Arrow on the photo . If needed, you can turn the lower eyelet to orient properly.

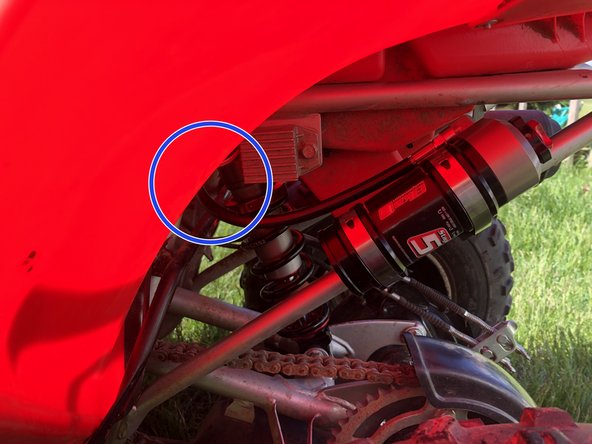
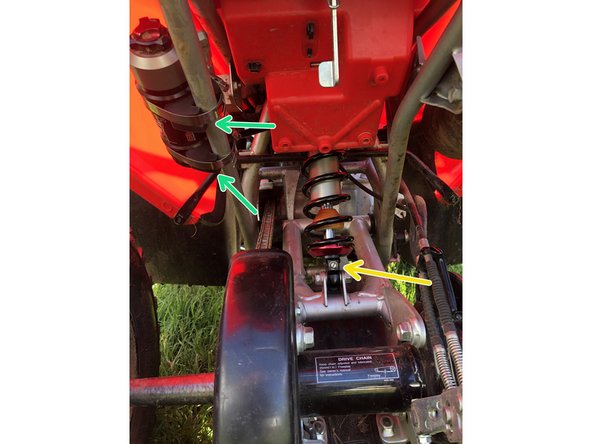
  2. Install the new Elka rear shock with the remote reservoir at the top  and oriented towards the front of the vehicle as indicated by the blue circle on the photo. On Stage 2, Stage 4, and Stage 5 models the rebound adjuster located on lower eyelet of the shocks should be oriented towards the rear of the vehicle(Yellow Arrow), as shown.If needed, you can turn the lower eyelet to orient properly. On Stage 3, Stage 4, and Stage 5 models, the remote reservoir neet to be attach on the sub-frame as showed on the picture . Use the rubber parts and clamp provide with your new elka shock  (green Arrow)
    • Install the new Elka rear shock with the remote reservoir at the top and oriented towards the front of the vehicle as indicated by the blue circle on the photo.

    • On Stage 2, Stage 4, and Stage 5 models the rebound adjuster located on lower eyelet of the shocks should be oriented towards the rear of the vehicle(Yellow Arrow), as shown.If needed, you can turn the lower eyelet to orient properly.

    • On Stage 3, Stage 4, and Stage 5 models, the remote reservoir neet to be attach on the sub-frame as showed on the picture . Use the rubber parts and clamp provide with your new elka shock (green Arrow)

    • On Stage 1 and Stage 2, install them with the shraeder nitrogen valve at the top of vehicle.

Finish Line

One other person completed this guide.

Pierre-Yves Deneault

Member since: 09/21/2017

193 Reputation

4 Guides authored

0 Comments

Add Comment

View Statistics:

Past 24 Hours: 0

Past 7 Days: 2

Past 30 Days: 13

All Time: 507

Elka Suspension Inc.

1585-M, De Coulomb
Boucherville (Quebec)
Canada J4B 8J7

Toll-Free (US & Canada):
1-800-557-0552

Direct Phone:
+1-450-655-4855