-
-
Lift the vehicle off the ground, then remove front tires.
-
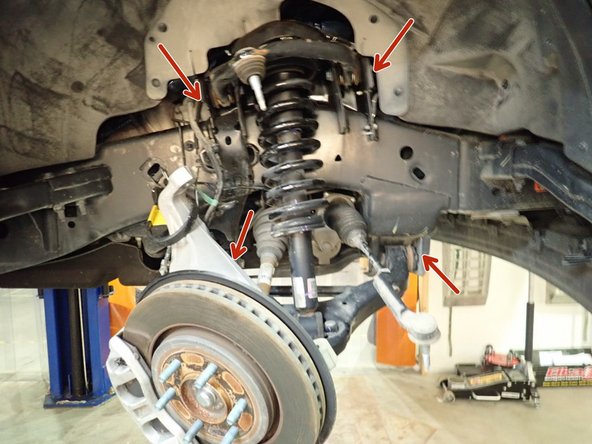
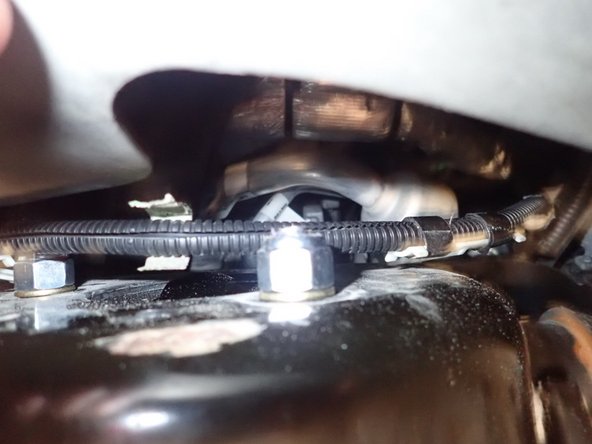
Remove brake lines bolts (3 on each sides) shown by red arrows.
-
-
-
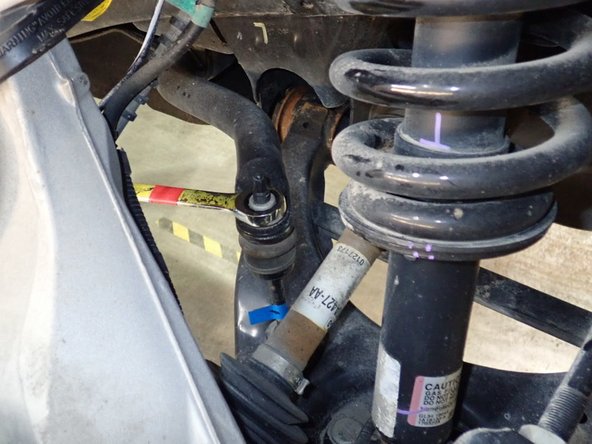
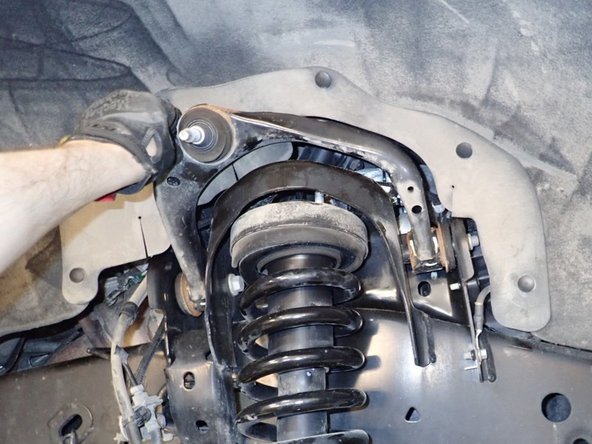
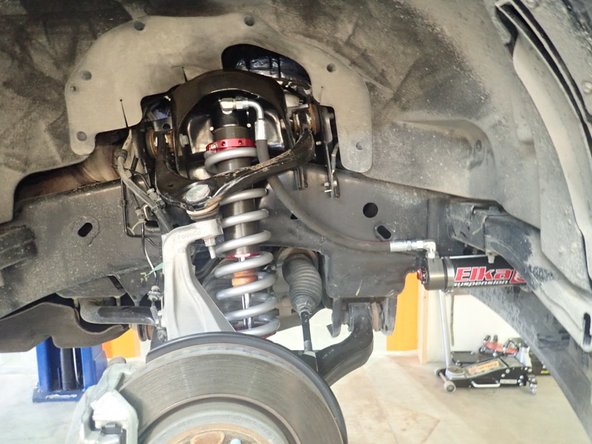
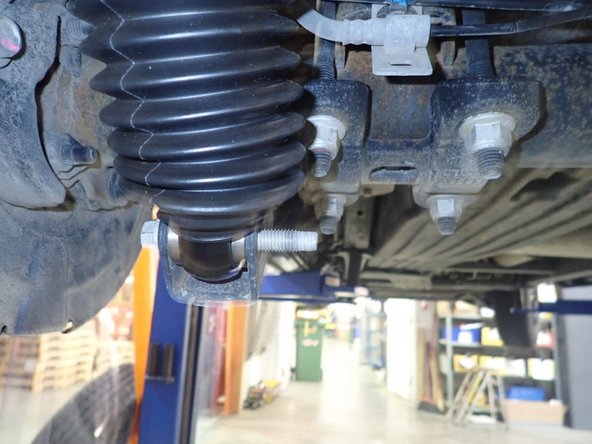
Remove upper arm ball joint nut and tie rod end ball joint nut, then separate them from steering knuckle.
-
-
-
Remove sway bar link nut
-
Remove the nuts from the upper and lower shock mounts.
-
-
-
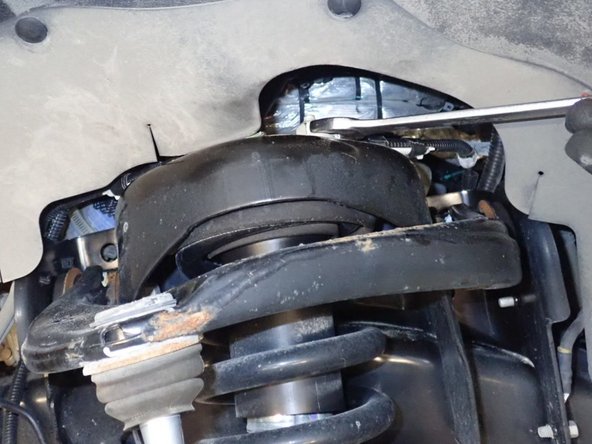
Loosen upper arm and lower arm bolts to help moving them to get out front shocks.
-
Push the lower arm as far as you can, then remove oem front shocks.
-
-
-
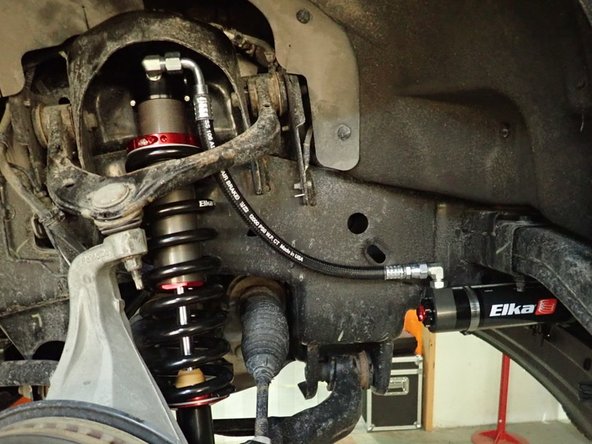
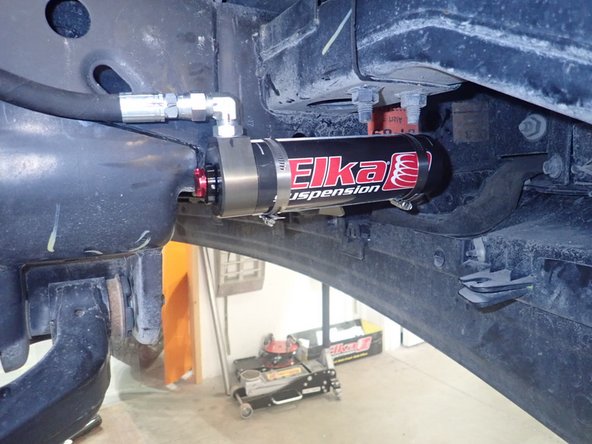
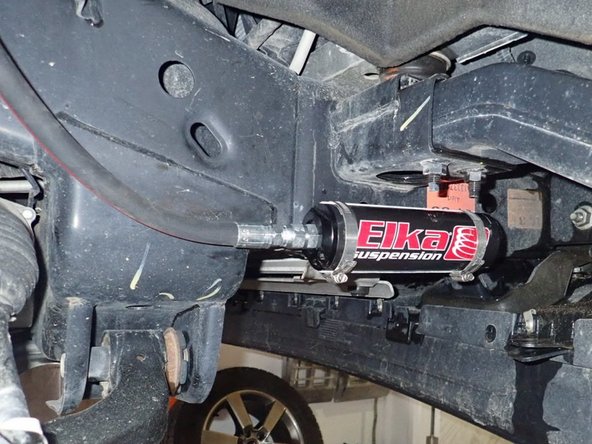
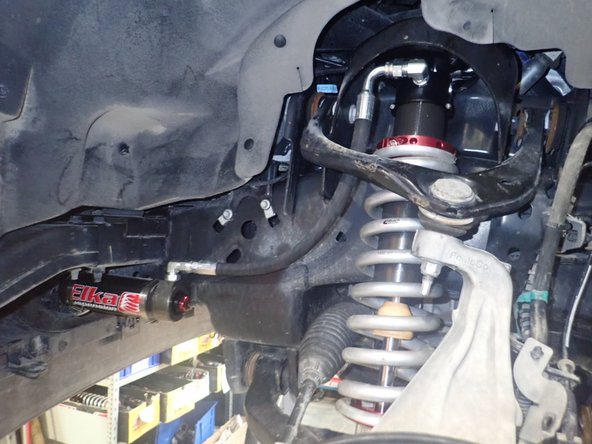
Install new Elka shocks with the upper hose fitting facing front of vehicle (passenger side shown)
-
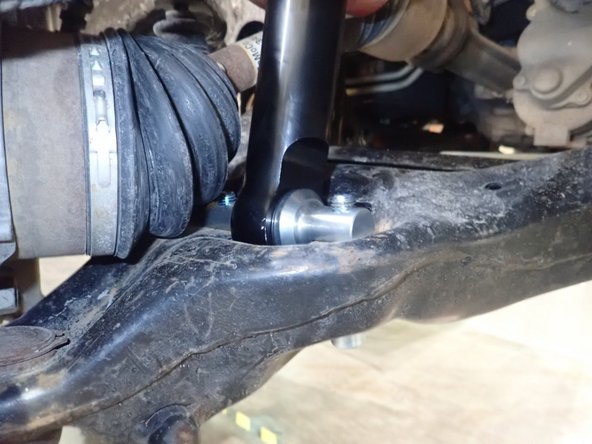
Sit the upper top plate first, then push the lower arm down to bring the lower shock mount in place.
-
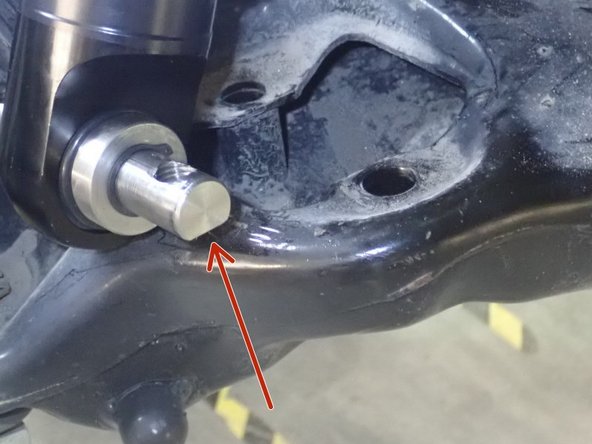
IMPORTANT NOTE: The lower mounting pin should be oriented with flats on the lower arm as shown. You can rotate the pin to have the good alignmnent with the holes.
-
-
-
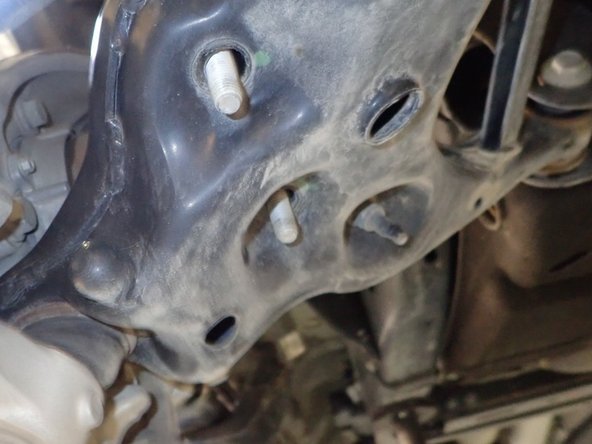
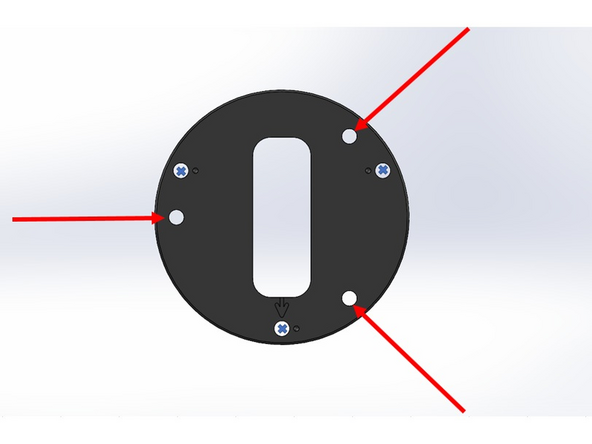
For the fixation of the top plate to the vehicule, use the 3 holes indicated by a red arrow as shown in the picture.
-
The arrow engraved on the top plate needs to be facing the outside of the vehicle.
-
-
-
Install supplied upper bolts and washers, then do the same for lower mounting bolts. Tighten all bolts.
-
-
-
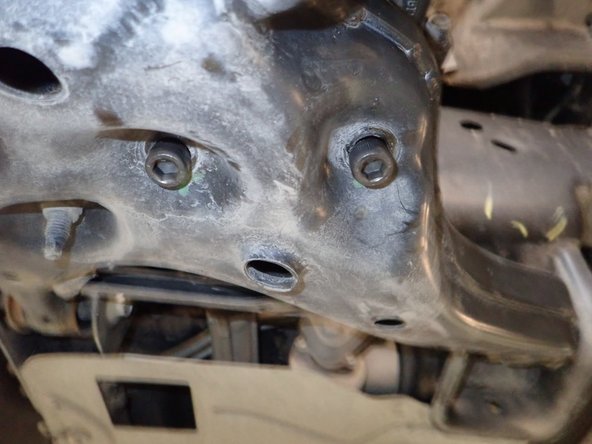
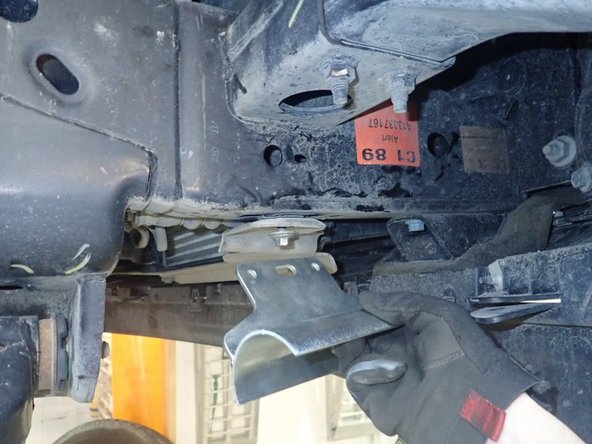
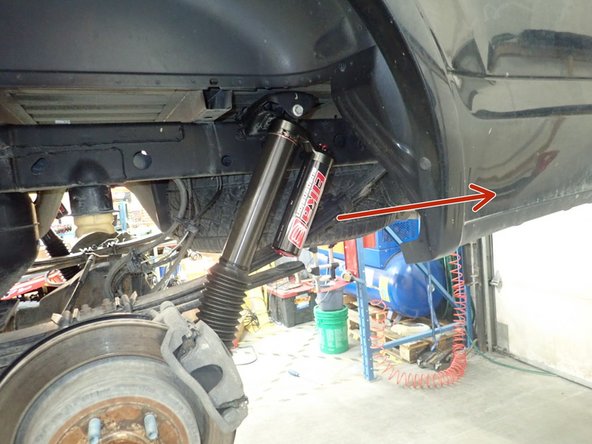
To install reservoir bracket, you have to remove the radiator support lower bolt, slide the bracket between support and frame, then fix the bracket through is center hole as shown ( passenger side shown)
-
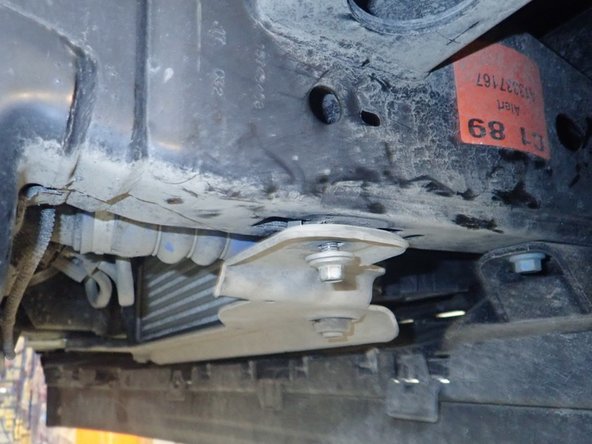
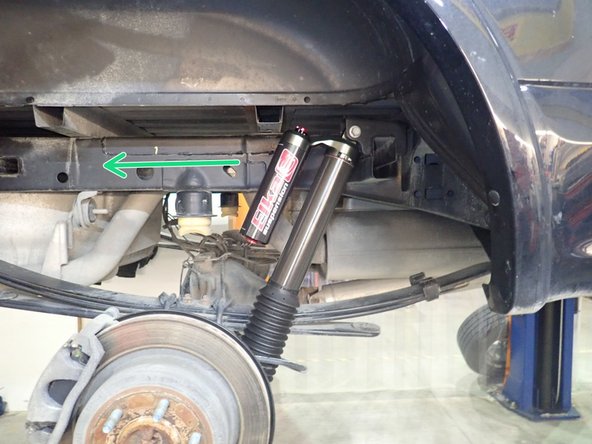
Install steel collars into bracket's slots.
-
-
-
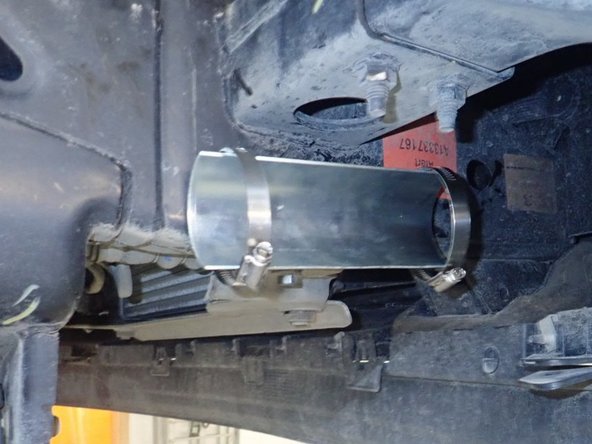
Install reservoirs as shown, making sure the hose is not rubbing anywhere and do not overbend it.
-
Then tighten the collars.
-
-
-
To reinstall upper arm on steering knuckle, we suggest to lift lower arm using a jack and a steel tube to bring knucle closer to upper arm.
-
Install upper arm nut, tie rod end, swaybar link, and brake lines bolts.
-
Don't forget to tighten upper and lower arms bolts.
-
ALIGNMENT IS CRITICAL: A professionnal alignment must be performed before driving this vehicle at highway speed. Do not attempt to drive your vehicle after this installed without having the alignment readjusted to factory specs.
-
-
-
Remove upper and lower shocks bolts and remove oem shocks.
-
Both rear Elka shocks are the same, they must be installed with piggyback reservoir up. DRIVER'S SIDE reservoir must facing the REAR of vehicle as shown by red Arrow, and PASSENGER'S SIDE reservoir must facing REAR of vehicle as shown by green Arrow.
-
Install lower mount first to install the Elka shocks, then you may need help to compress shocks in order to align the hole of the upper mount bolt.
-
Tighten all nuts
-