-
-
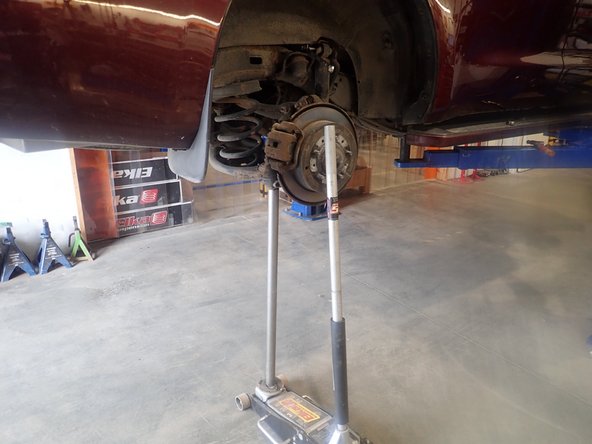
Lift the vehicle off the ground, then remove tires.
-
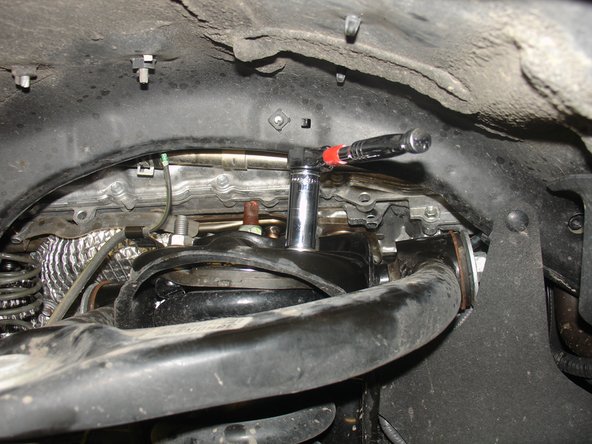
Remove the brake line bolts located on upper arm and knuckle to ensure that it will not be damaged and stretched during installation.
-
-
-
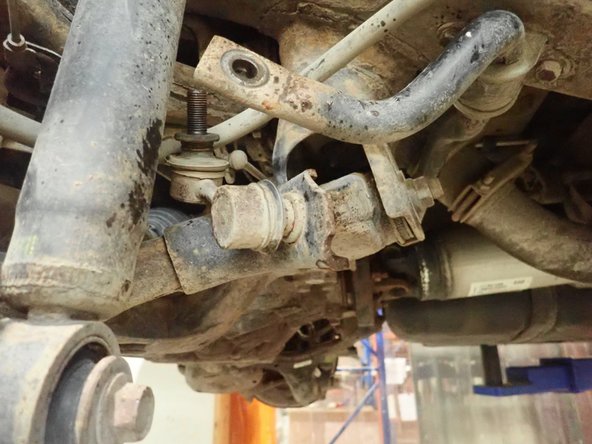
Remove the upper arm ball joint nut, then separate the upper arm from knuckle and lift the upper arm to have the space needed to remove shock.
-
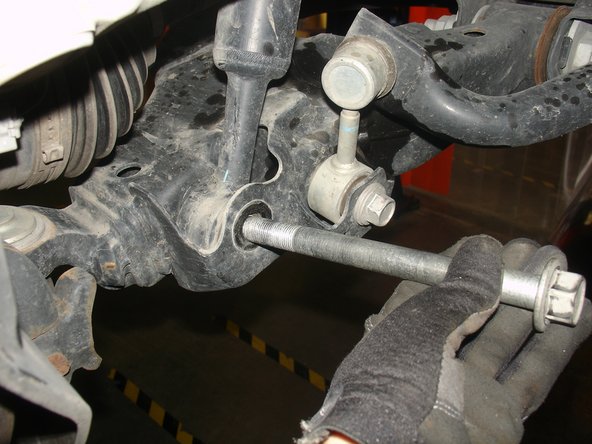
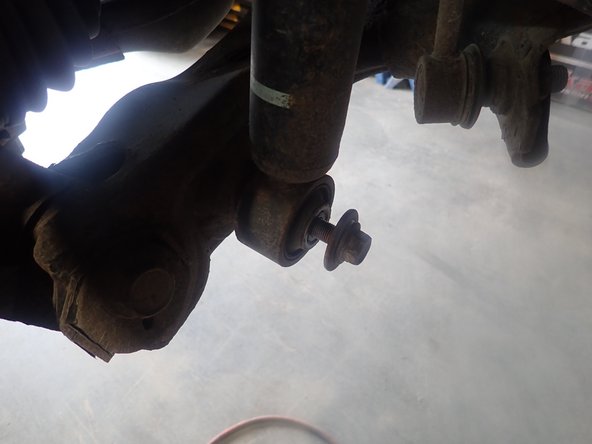
Remove sway bar link lower bolt.
-
-
-
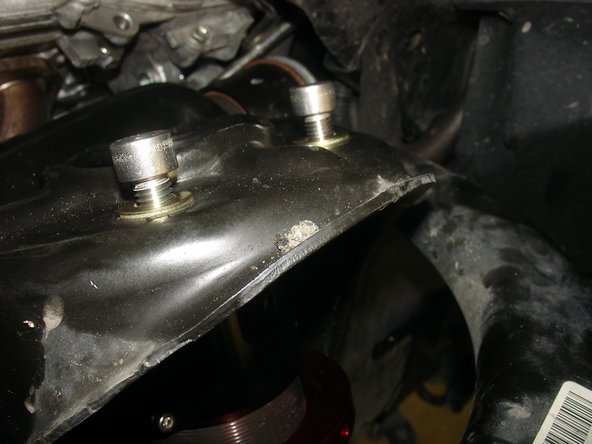
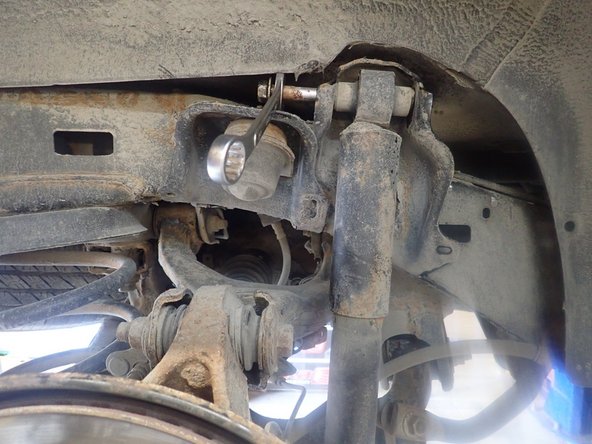
Remove the 4 nuts of upper shock mount. DO NOT REMOVE CENTRAL NUT.
-
Remove lower shock bolt.
-
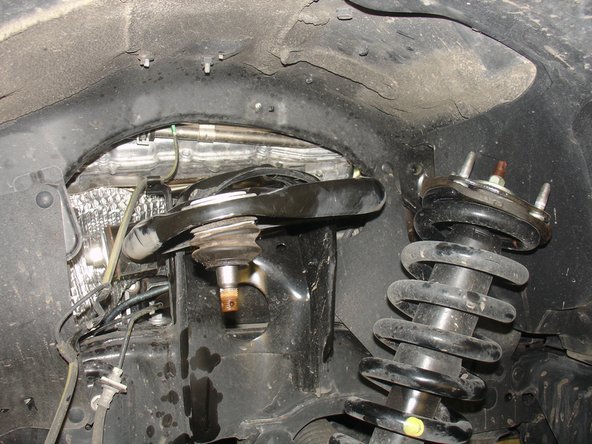
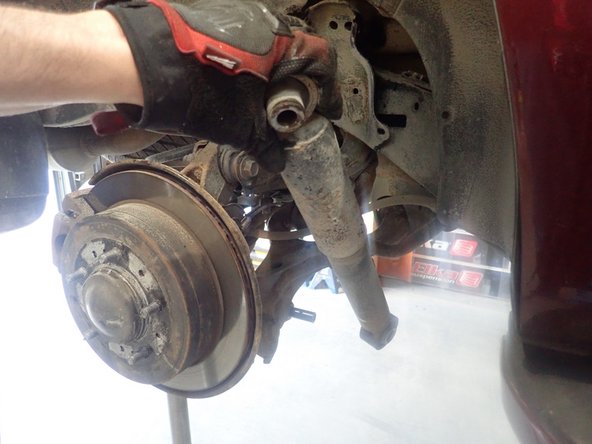
Pull the lower suspension arm down and remove oem shock.
-
-
-
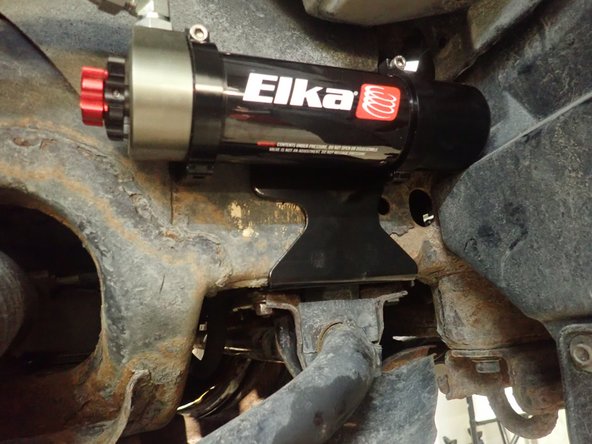
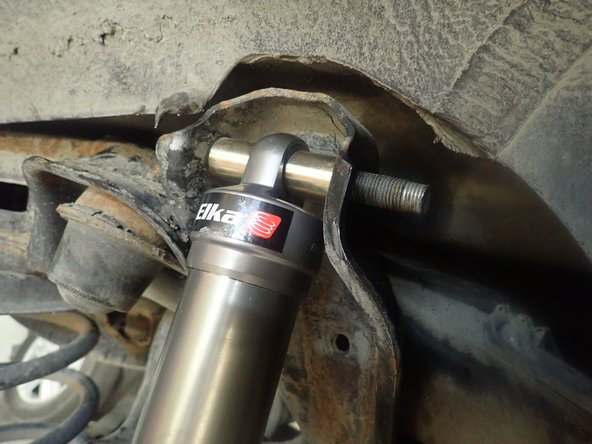
Install new Elka shocks begining by putting the lower eyelet in place. Then, pull the lower suspension arm down, and put upper part of shock in place.
-
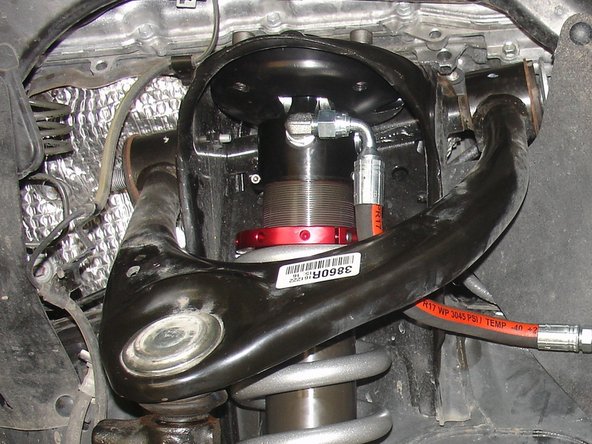
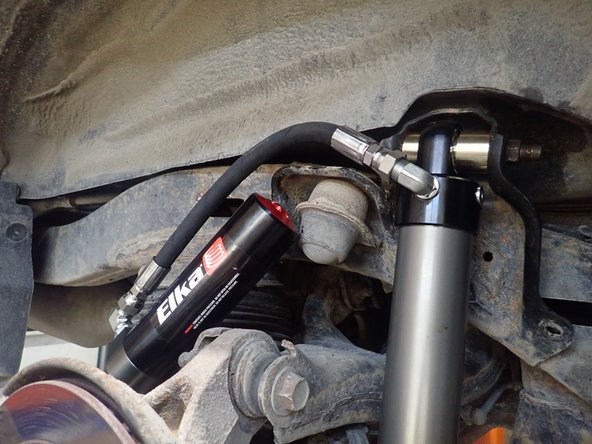
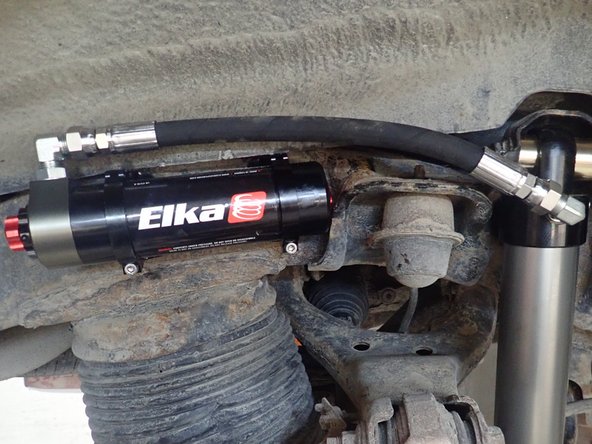
The hose fitting must face outside the vehicle. The hose must facing front of vehicle (right side shown).
-
Install provided bolts and washers to fix the top plate. Torque them at 35 Ft/Lb.
-
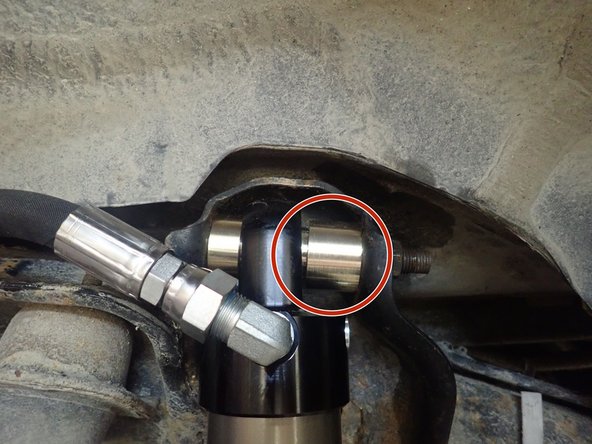
Install lower bolt and torque it at 100 Ft/Lb. ****IMPORTANT**** Some year/model vehicle's lower arms need to be grinded to allow clearance for Elka lower eyelet. Ensure the eyelet do not touch lower arms in the area indiced by red circle on photo.
-
-
-
Remove front skid plate to have access to sway bar supports.
-
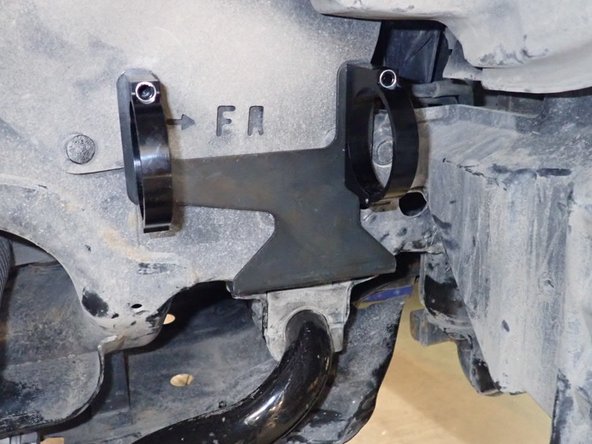
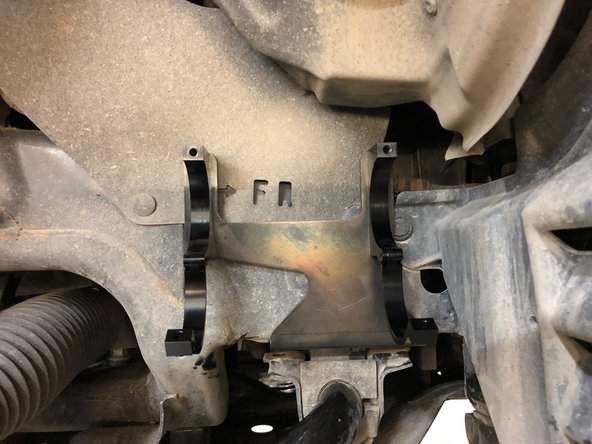
Remove sway bar support bolts, then slide the shock reservoir brackets between support and frame and re-install support bolts in place. (right side shown)
-
-
-
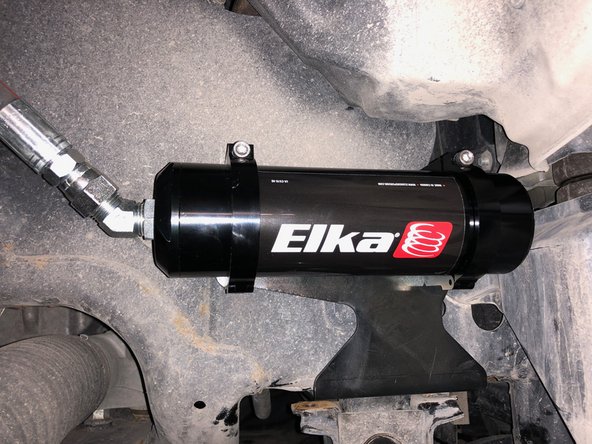
Install reservoir as shown into the holding clamps. Torque the bolts to 10 Ft-Lb.
-
Make sure the hose will nut rub on upper suspension arm, is not over stretch or overbend.
-
Reassemble all the components using manufacturer's specs.
-
ALIGNMENT IS CRITICAL: A professional alignment must be performed before driving this vehicle at highway speeds. Do not attempt to drive your vehicle after this install without having the alignment readjusted to factory specs.
-
-
-
Using an underhoist stand or a jack, lift slightly rear axle to remove tension on shocks bolts.
-
Remove sway-bar link on one side to allow lowers arms to temporary move separately.
-
-
-
Remove upper and lower bolts and keep them to install Elka shocks.
-
-
-
2.0'' (E46IFP) SHOCK MODELS:
-
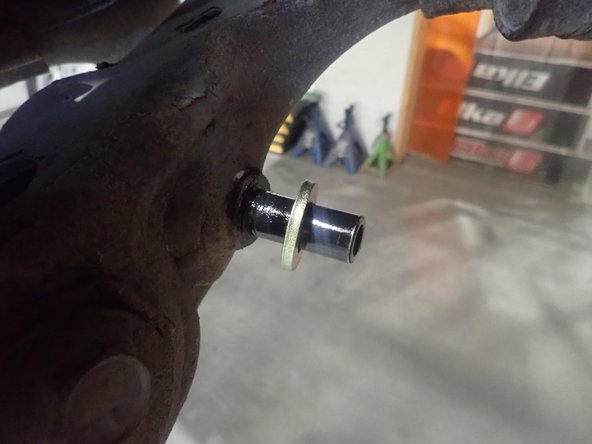
Clean carefully lower stud and apply small amount of grease on it.
-
Slide provided washer first, then slide lower shock's end.
-
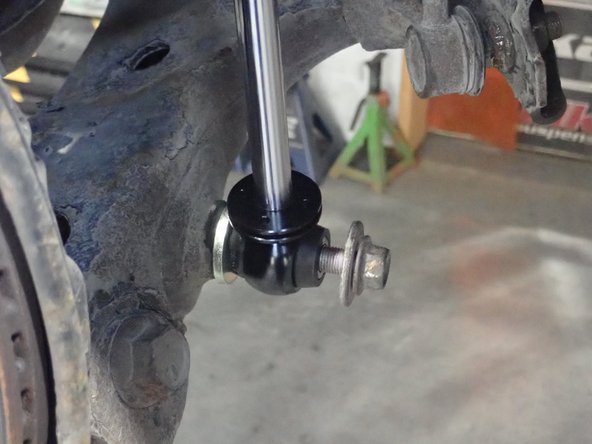
Apply thread locker on lower bolt and torque it at 60 Ft-Lb.
-
-
-
2.0'' (E46IFP) SHOCK MODELS:
-
Compress shock then install upper bolt.
-
Apply thread locker and torque upper nut at 80 Ft-Lb.
-
-
-
2.5'' (RR56B/RR56C) SHOCK MODELS:
-
Clean carefully lower stud and apply small amount of grease on it.
-
Slide lower eyelet on stud.
-
Apply thread locker on lower bolt and torque it at 60 Ft-Lb.
-
-
-
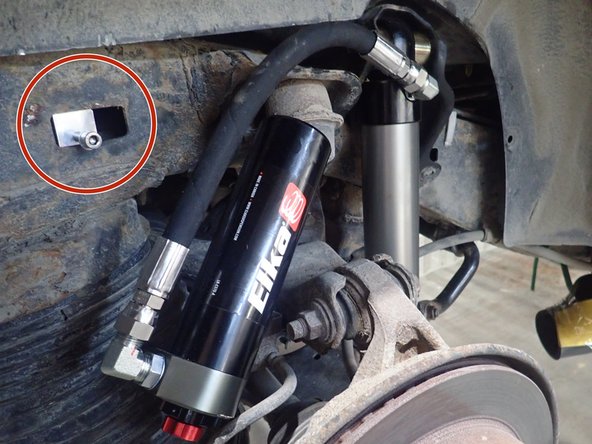
With the reservoir hose facing the rear of vehicle, compress shock then install upper bolt. (Right side shown)
-
Upper offset spacers are used on 2.5'' shock's head, be sure larger spacer is on the opposite side of reservoir as shown by red circle.
-
Apply thread locker and torque upper nut at 80 Ft-Lb.
-
-
-
Reservoir bracket installation:
-
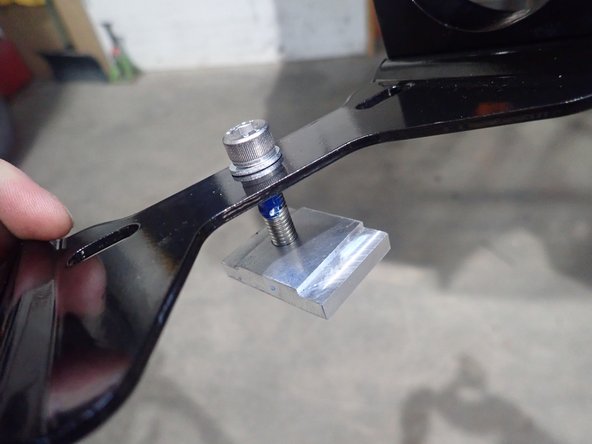
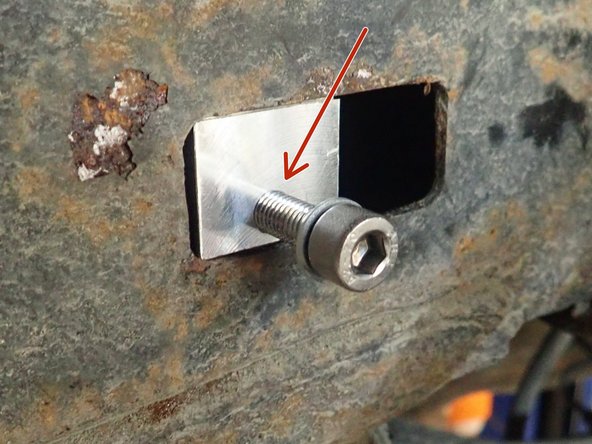
Screw the rectangular piece only a few turns in the center of the bracket as shown, then apply threadslocker on screw threads.
-
Rectangular piece must be inserted in frame's square hole shown by red circle. Threaded hole in rectangular piece must be installed facing bottom of square hole as shown by red arrow.
-
-
-
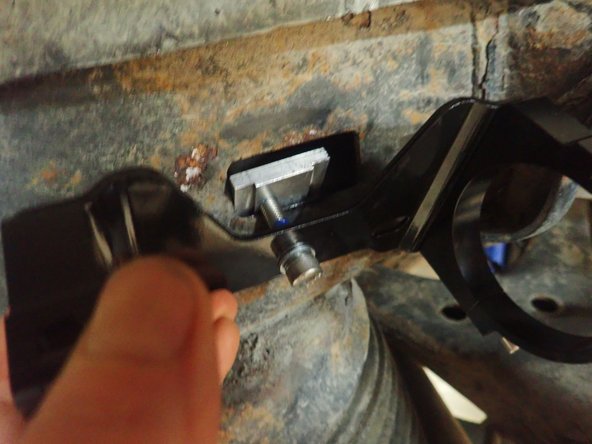
Insert rectangular piece in square hole, turn and position it properly to avoid rotation of part, and tighten in place at 20 Ft-Lb.
-
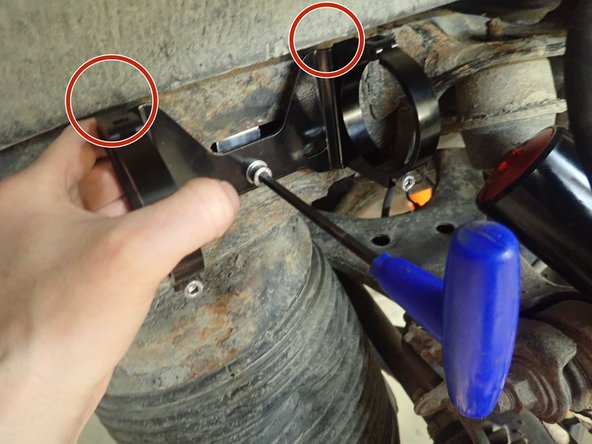
Areas shown by red circles can touch bracket clamps in application because the body is mounted on rubber. We suggest to trim metal sheet around this areas.
-
Sit reservoir into bracket's clamps, then place the reservoir in a way to place hose as close to the frame as possible without touching it.
-
When reservoir is placed properly, apply threads locker on clamp's bolts and torque them at 10 Ft-Lb.
-
Re-install sway-bar link.
-
-
-
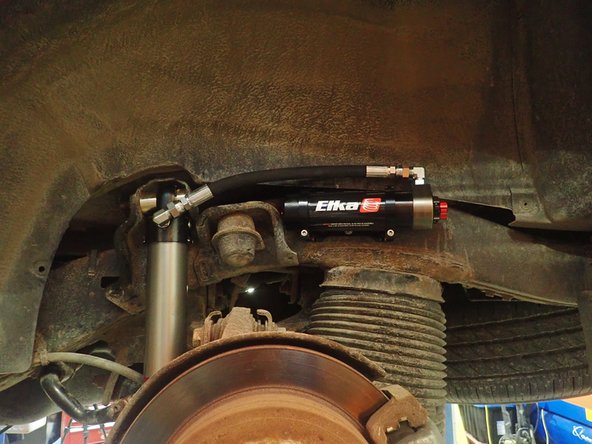
FINAL REAR INSTALLATION PHOTOS:
-
ALIGNMENT IS CRITICAL: A professional alignment must be performed before driving this vehicle at highway speeds. Do not attempt to drive your vehicle after this install without having the alignment readjusted to factory specs.
-