-
-
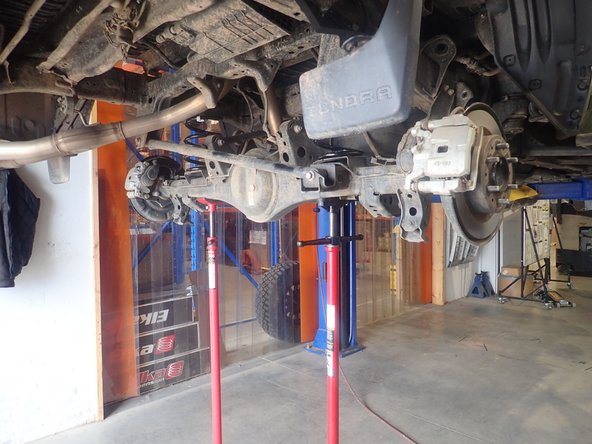
Lift the vehicle off the ground, then remove the front tires.
-
Remove the brake line bolts located on the upper arm and knuckle. Also remove the ABS sensor wire to ensure that it will not be damaged or stretched during installation.
-
-
-
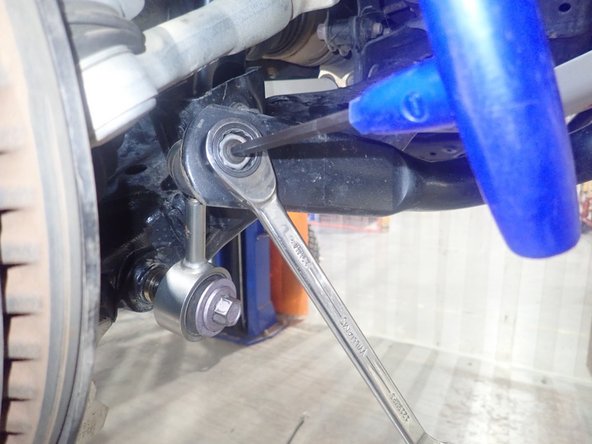
Remove the sway-bar link on both sides to allow the lower arms to temporary move separately.
-
Remove the upper arm ball joint nut, then separate the upper arm from the knuckle. Loosen the upper control arm nut to be able to lift the upper arm, allowing the space needed to remove the shock.
-
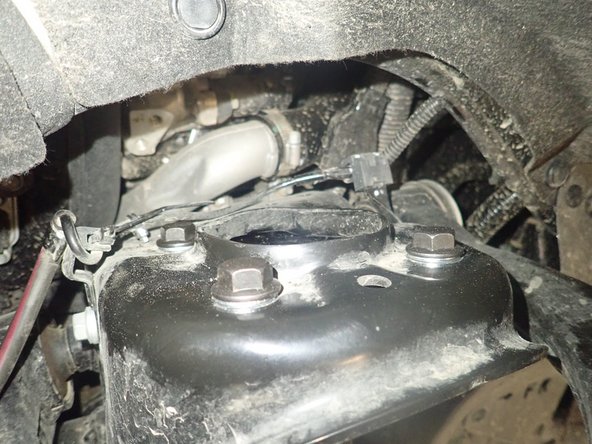
Remove the 4 nuts of upper shock mount. DO NOT REMOVE CENTRAL NUT.
-
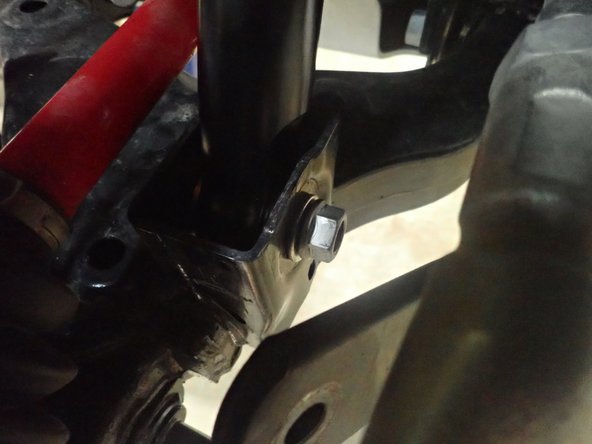
Remove the lower shock bolt.
-
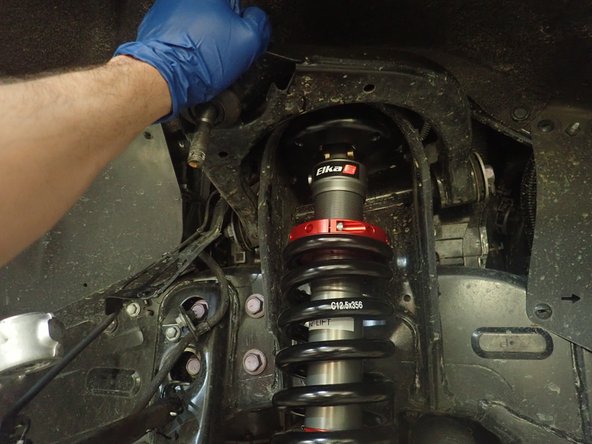
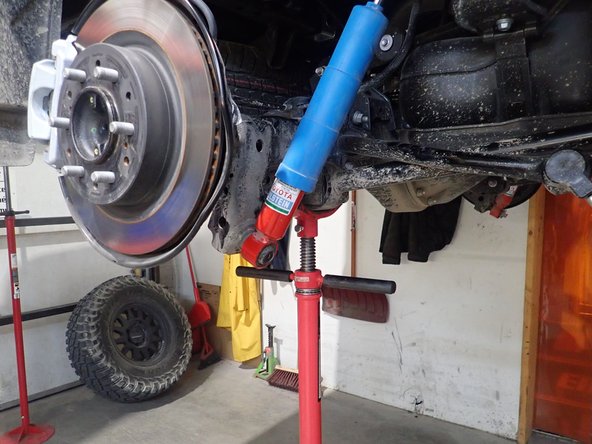
Pull the lower suspension arm down and remove the oem shock.
-
-
-
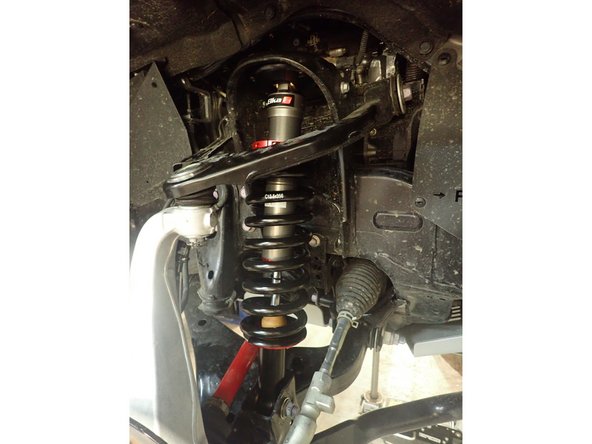
Install the new Elka shocks begining with putting the upper top plate in place. Then, push the lower suspension arm down, and put the lower eyelet of the shock in place.
-
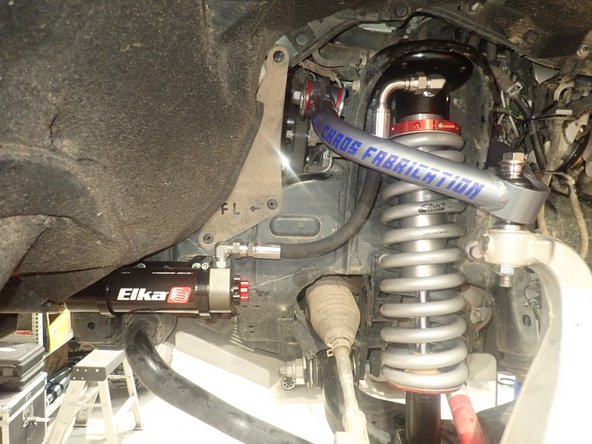
On remote reservoir models, the hose fitting must face the outside of the vehicle, and the hose must facing the front of vehicle (right side shown).
-
Torque the 4 upper bolts to 35 Ft-Lb, and lower bolt to 120 Ft-Lb.
-
-
-
Reassemble the knuckles and upper control arms.
-
Torque the upper control arms nut to 70 Ft-Lb first, then continue to screw the nut to align it with the stud hole and re-install the lock pin.
-
Reinstall the brake line bolts and ABS sensor.
-
-
-
ON 2-3'' LIFT SET-UP ONLY:
-
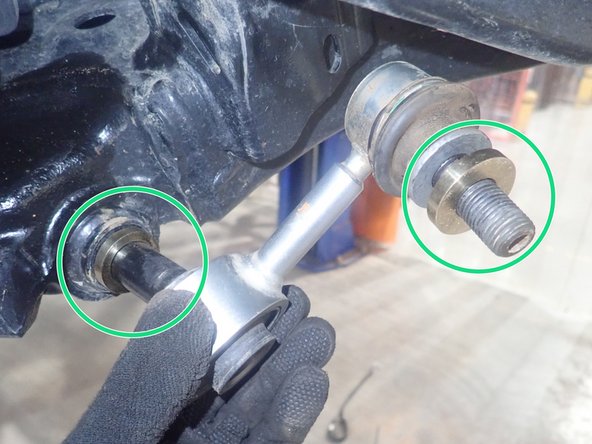
Before reinstalling the sway-bar links, slide both supplied spacers as shown by green circles to offset links and avoid risk of binding on each side of vehicle.
-
Install upper ball joint of links in sway-bar, then pull the sway bar down to slide lower part of links in lower arms. Torque bolts at 60 Ft-Lb.
-
ON 0-2'' LIFT SET-UP, no spacers needed, just reinstall links as is.
-
-
-
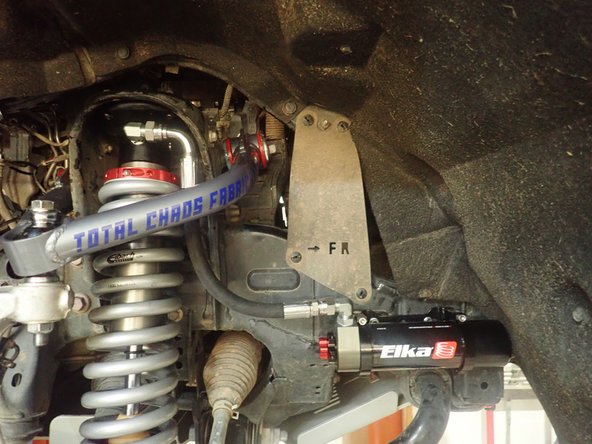
ELKA SHOCKS WITH RESERVOIR: (Right side shown)
-
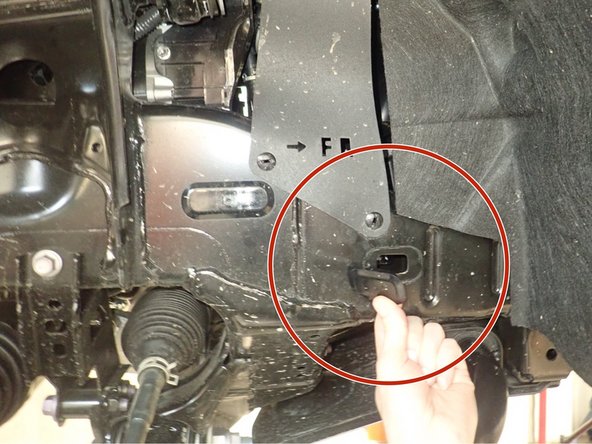
Remove the plastic caps on the outside and inside of the frame. (right side shown).
-
Insert a provided square spacer in the frame's inside hole as shown.
-
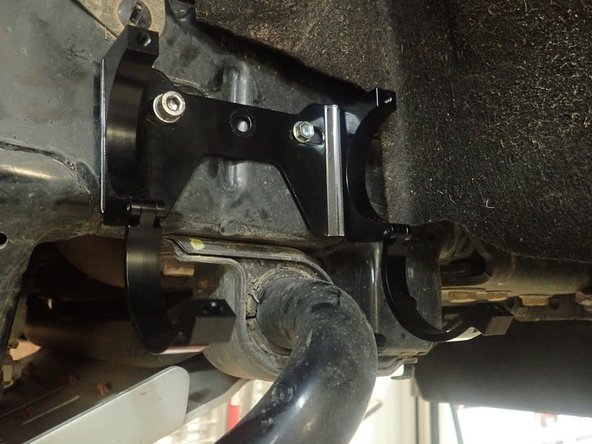
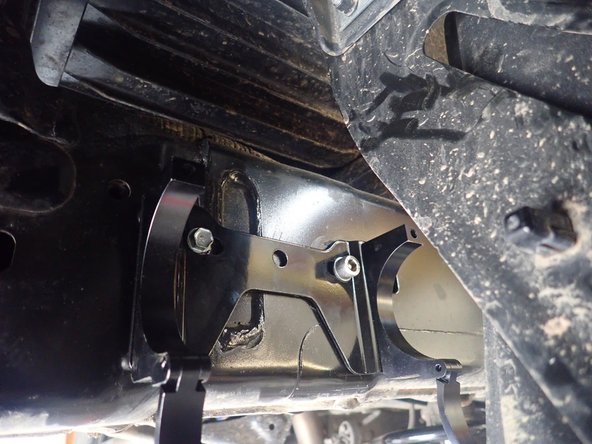
Fix the bracket in place using the 8mm bolt in the leftmost bracket hole on the left side, and rightmost hole on the right side, orienting it as horizontally as possible. Use threads locker and torque the bracket bolt to 15 Ft-Lb. Use the supplied self-taping screw to secure the bracket in the bracket's hole facing the front of the vehicle.
-
-
-
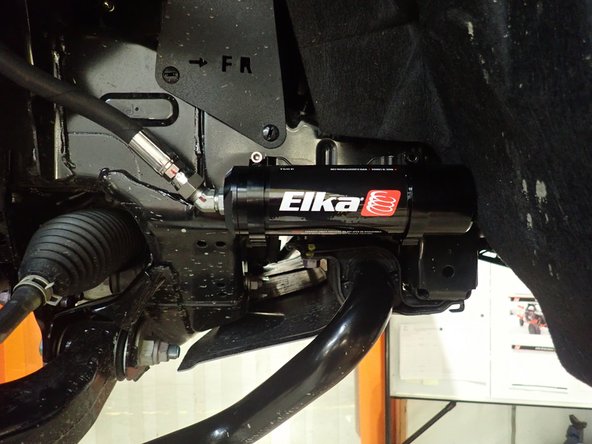
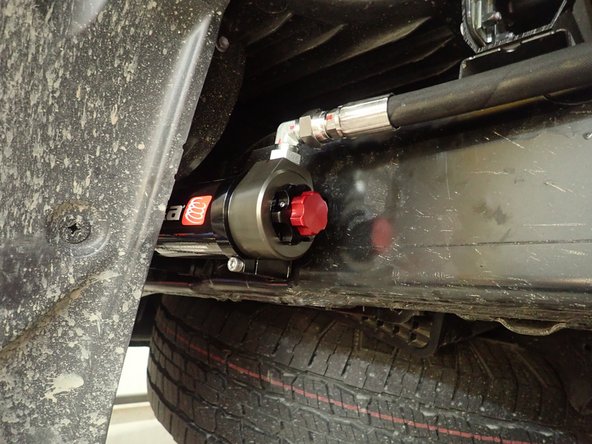
Sit the reservoir into the bracket's clamps, then place the reservoir in a way to position the hose properly. BE CAREFUL TO NOT OVERBEND THE HOSE OR CREATE RUBBING ON THE FRAME OR UCA.
-
When the reservoir is placed properly, apply thread locker on the clamp's bolts and torque them to 10 Ft-Lb.
-
ALIGNMENT IS CRITICAL: A professional alignment must be performed before driving this vehicle at highway speeds. Do not attempt to drive your vehicle after this install without having the alignment readjusted to factory specs.
-
-
-
Lift the vehicle off the ground, then remove the rear tires.
-
Using an underhoist stand or a jack, lift the rear axle to remove the load on the shock's bolts.
-
Remove the upper nut, then remove the lower bolt. Keep the lower oem bolt for installing the Elka shock.
-
Compress and remove the oem shocks.
-
-
-
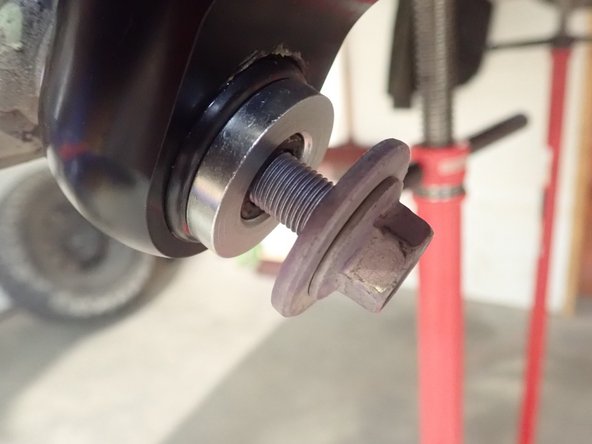
Make sure the lower stud is free of rust, clean it if necessary.
-
Insert the lower shock's eyelet on the stud first, then screw the lower bolt without tightening it.
-
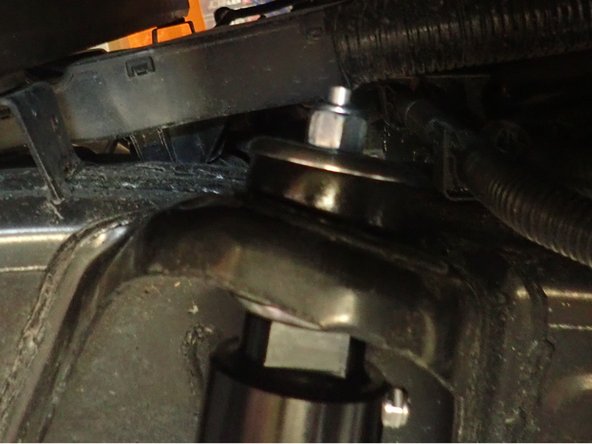
Apply some supplied grease on the 2 rubber isolators. There must be 1 isolator under and 1 over the shock mounting.
-
Compress the shock, then align upper the Elka stud on the frame's hole.
-
Torque lower bolt to 80 Ft-Lb.
-
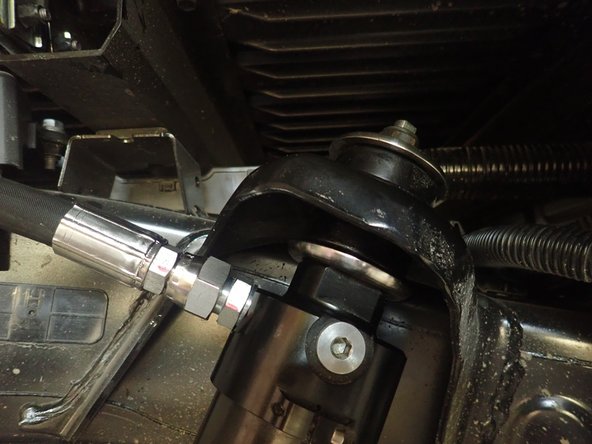
Install the upper isolator and upper washer, then torque the upper nut to 50 Ft-Lb. This operation could be easier if truck is on the ground or applying some load on the axle with underhoist.
-
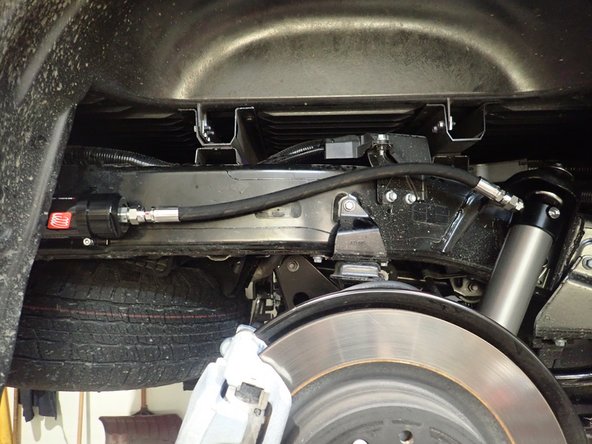
On remote reservoir shocks, the hose must face the rear of vehicle.
-
-
-
ELKA SHOCKS WITH RESERVOIR:
-
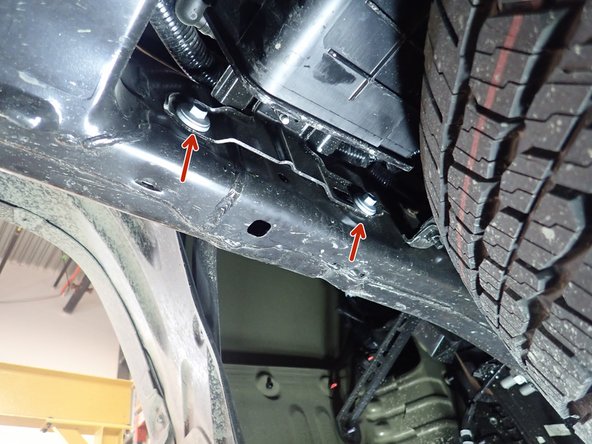
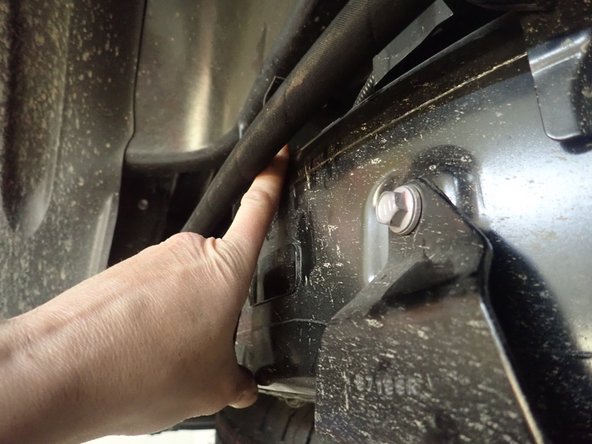
Remove the plastic caps close to the rear fender outside and inside frame.
-
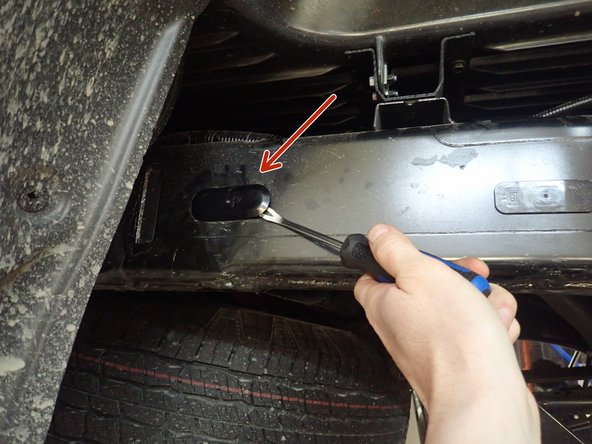
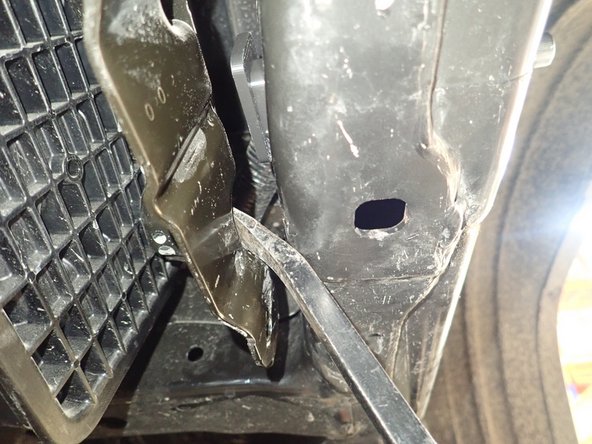
On the right side, to have access to the cap inside of frame, remove the screws of the steel bracket then pry the bracket to have access.
-
-
-
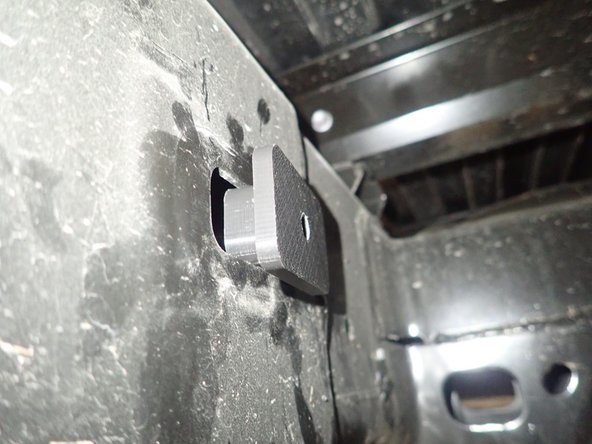
In the holes inside of the frame, insert the supplied square spacers as shown.
-
Fix the bracket in place using the 8mm bolt in the rightmost bracket hole on right side, and leftmost hole on left side, orienting it as horizontally as possible. Use threads locker and torque the bracket bolt to 15 Ft-Lb. Use the supplied self-taping screw to secure the bracket in the bracket's hole facing the rear of the vehicle.
-
-
-
Sit the reservoir into the bracket's clamps, then place the reservoir in such a way as to position the hose properly. BE CAREFUL TO NOT OVERBEND THE HOSE OR CREATE RUBBING ON THE FRAME.
-
When the reservoir is placed properly, apply thread locker on the clamp's bolts and torque them to 10 Ft-Lb.
-