Elka Suspension
LEADERS IN POWERSPORTS SHOCK ABSORBERS | 1-800-557-0552

v1.0

Major VersionM

by Sebastien Blain

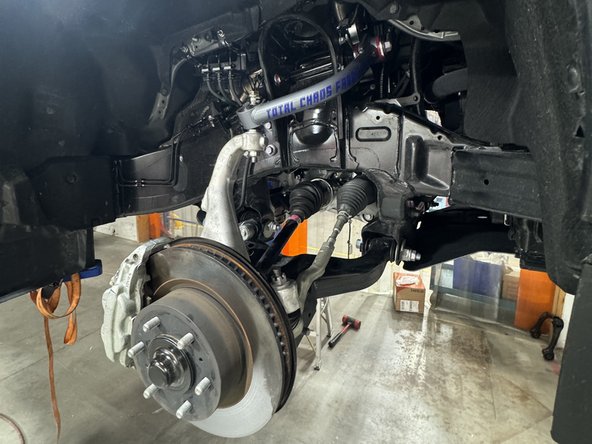
  1. Lift the vehicle off the ground, then remove the tires. Remove the bolts that holds the ABS sensor line. the 3 bolts have been pointed by a red arrow. (right side show) Remove the bolts that holds the ABS sensor line. the 3 bolts have been pointed by a red arrow. (right side show)
    • Lift the vehicle off the ground, then remove the tires.

    • Remove the bolts that holds the ABS sensor line. the 3 bolts have been pointed by a red arrow. (right side show)

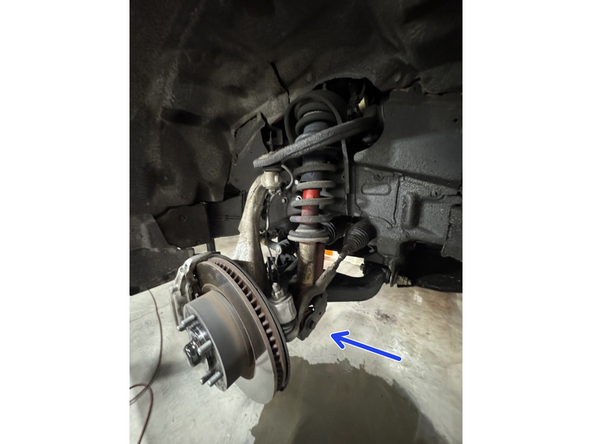
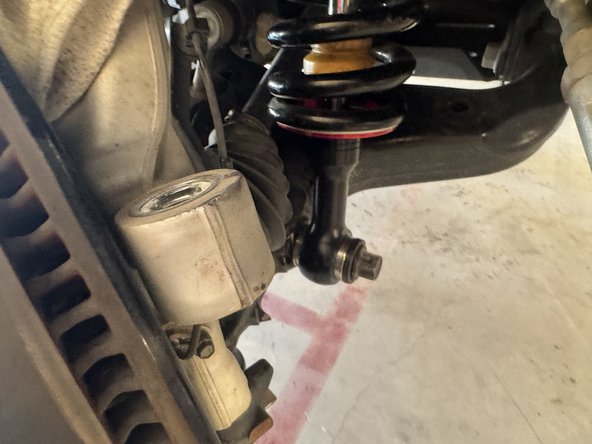
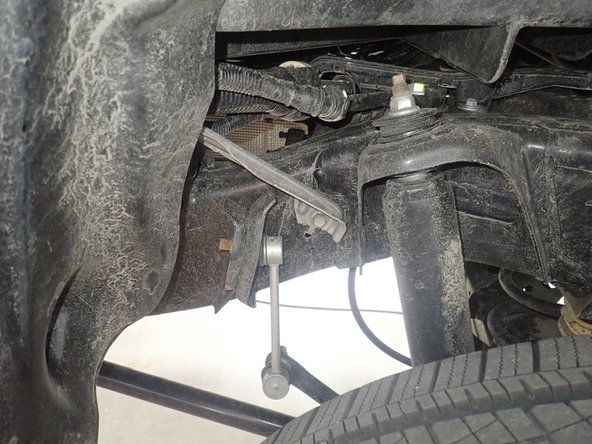
  2. Remove the nuts from the tie rod end Remove the sway bar link Remove upper arm ball joint nut and seperate it from steering knuckle.
    • Remove the nuts from the tie rod end

    • Remove the sway bar link

    • Remove upper arm ball joint nut and seperate it from steering knuckle.

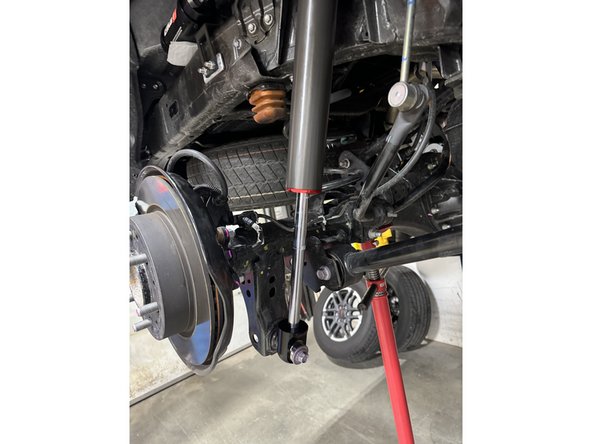
  3. Remove the bolt and nut from the lower shock mounts Remove the 4 nuts of the upper shock. Remove the shock from the vehicle.
    • Remove the bolt and nut from the lower shock mounts

    • Remove the 4 nuts of the upper shock.

    • Remove the shock from the vehicle.

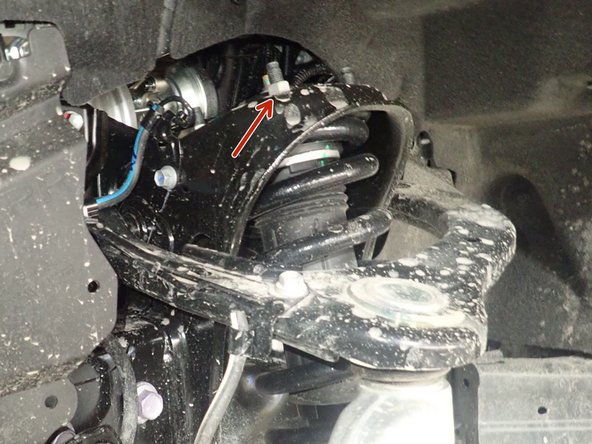
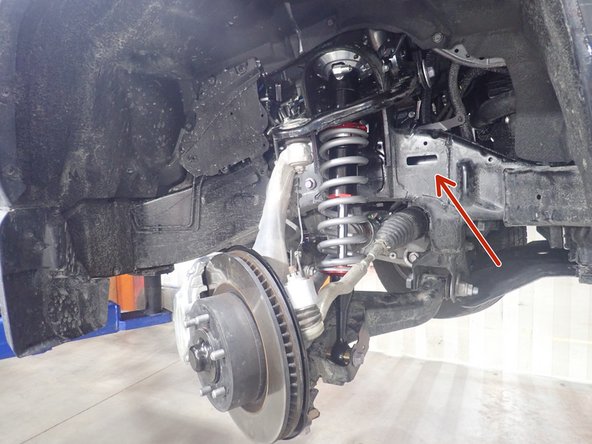
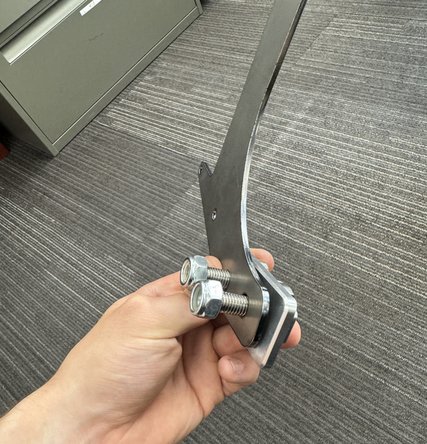
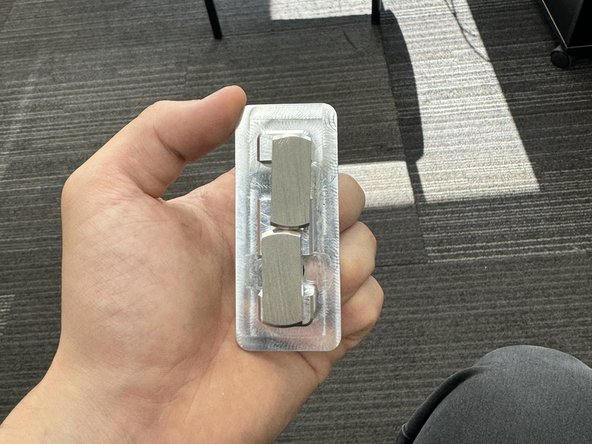
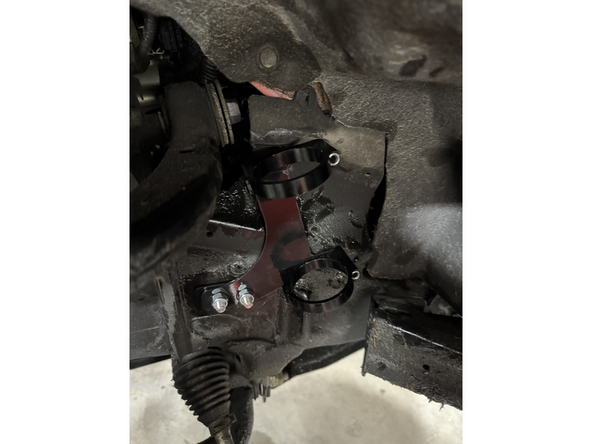
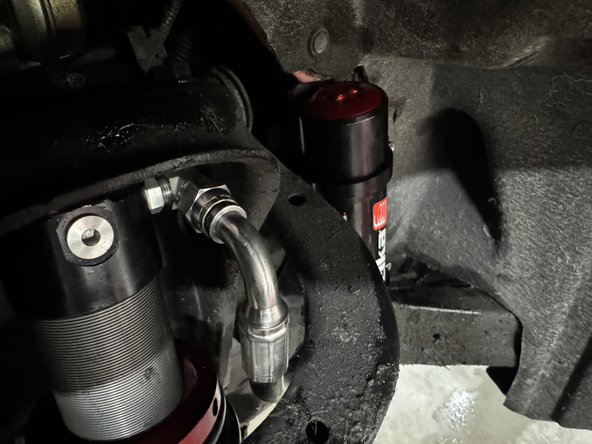
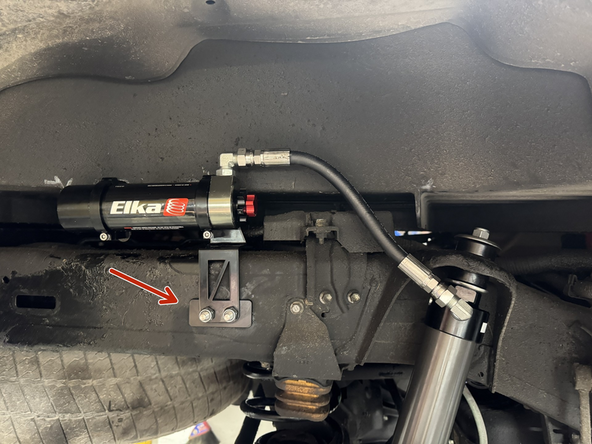
  4. Remove the plastic cap shown by the red arrow on both sides. Use the supplied hardware to hold the reservoir bracket in the hole in the  frame reveal by removing the plastic cap. Insert the hardware inside the hole. Make sure the two studs are aligned as in the picture
    • Remove the plastic cap shown by the red arrow on both sides.

    • Use the supplied hardware to hold the reservoir bracket in the hole in the frame reveal by removing the plastic cap.

    • Insert the hardware inside the hole. Make sure the two studs are aligned as in the picture

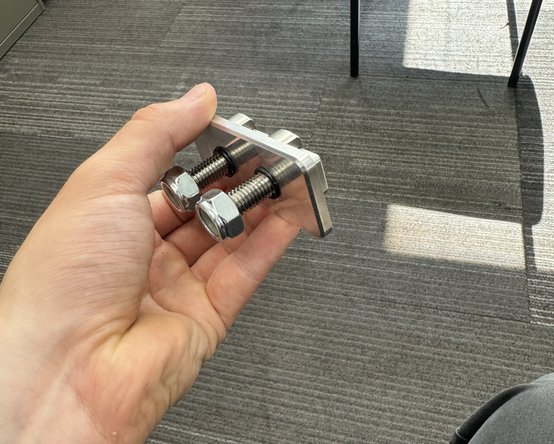
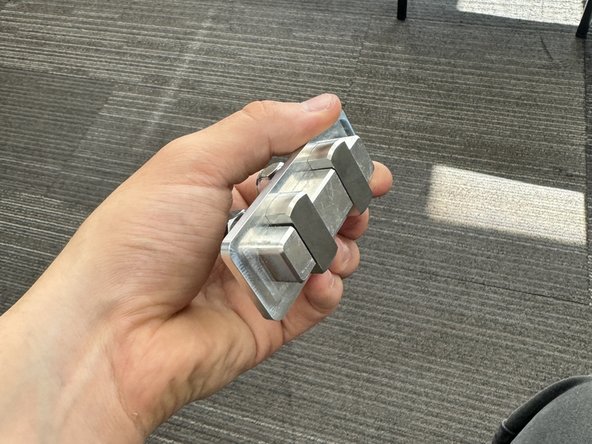
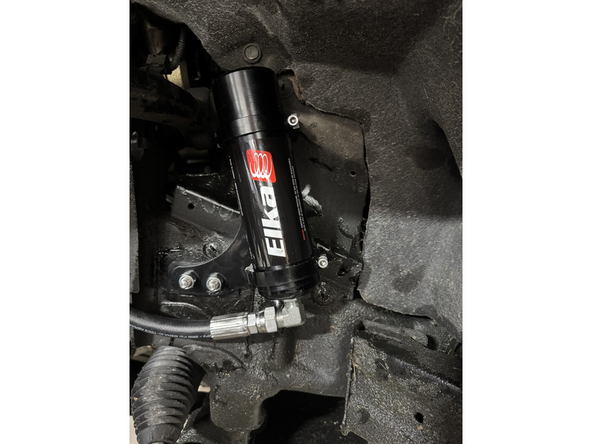
  5. When the bracket holder is inserted in the frame hole, turn the studs 90 deg as show in the picture to lock in place the bracket holder in the frame hole Role down the oring on the stud to the face of the bracket holder to help the stud no moving for the next part. Tighten the 2 nuts
    • When the bracket holder is inserted in the frame hole, turn the studs 90 deg as show in the picture to lock in place the bracket holder in the frame hole

    • Role down the oring on the stud to the face of the bracket holder to help the stud no moving for the next part.

    • Tighten the 2 nuts

    • Left side shown

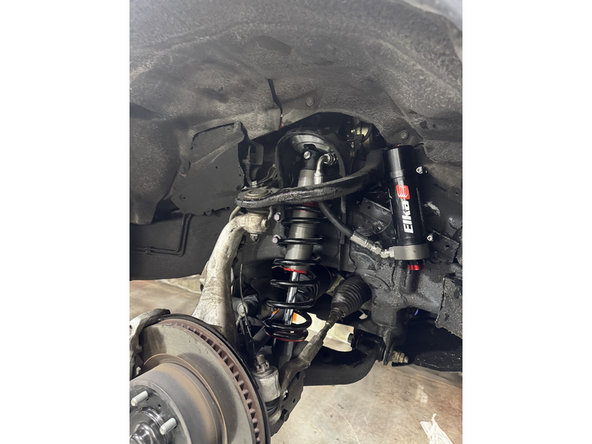
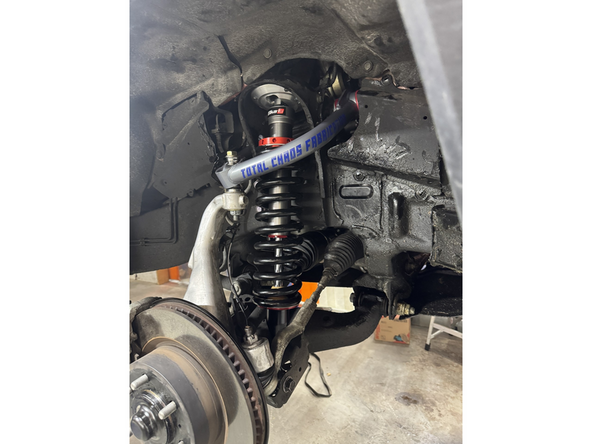
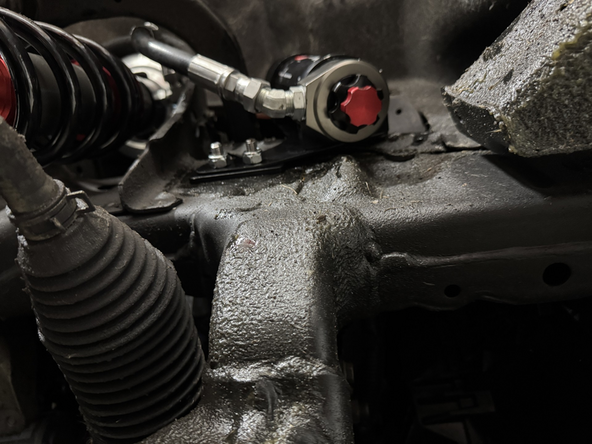
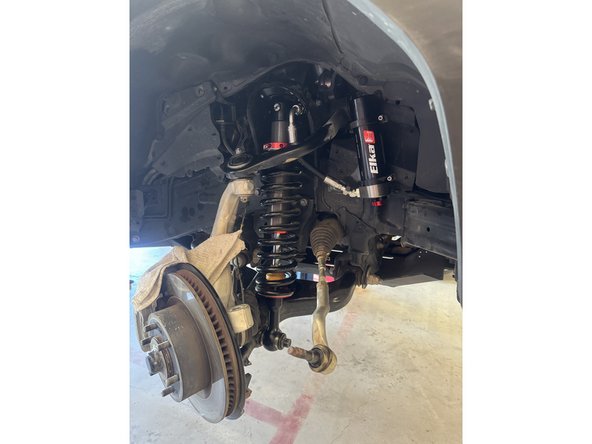
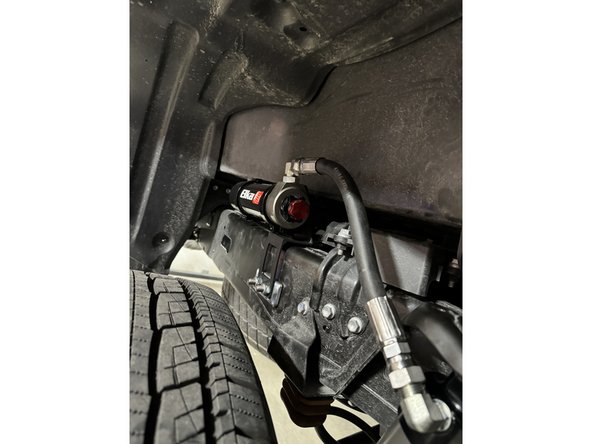
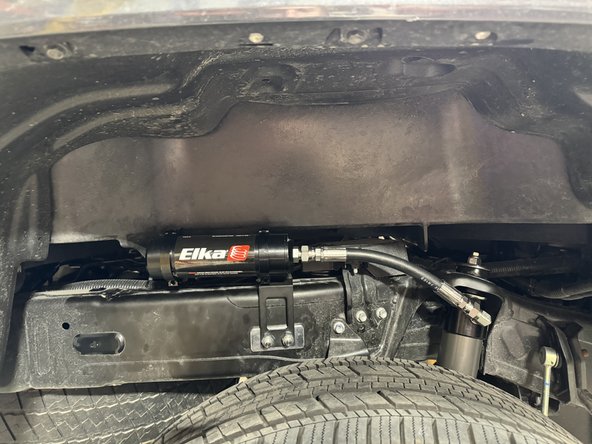
  6. Install the Elka shocks using the oem lower bolts and the provided upper bolts. Hoses must face the front of vehicle as shown (right side shown). (The shock and bracket in the picture are prototype, not the real shock.) Reinstall the lower bolt and torque to OEM spec
    • Install the Elka shocks using the oem lower bolts and the provided upper bolts. Hoses must face the front of vehicle as shown (right side shown). (The shock and bracket in the picture are prototype, not the real shock.)

    • Reinstall the lower bolt and torque to OEM spec

    • Install the 4 uppers bolts and torque to 35 Ft-Lbs.

    • Reassemble the knuckle with the upper control arm. Torque the upper control arm nut to OEM spec

    • Reassemble the tie rod end, then torque the nut to OEM spec

    • Reinstall the sway bar link

    • Reinstall the ABS line bolts.

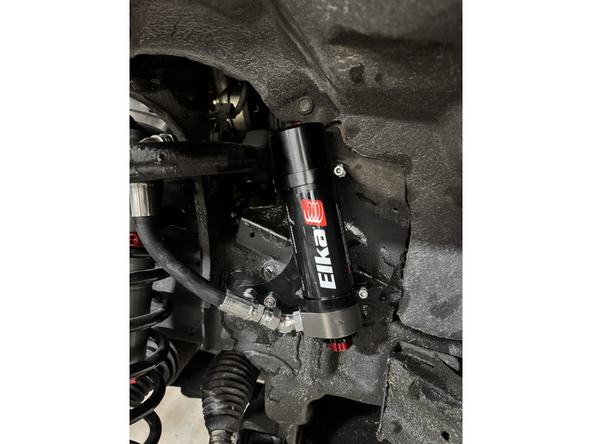
    • Install the reservoir in the the bracket. When the reservoir is placed properly, torque bracket's bolts at 10 Ft-Lb.

  7. IMPORTANT : Make sure the hose does not touch anything. If needed, rotate the reservoir in the bracket to clear the hose. ALIGNMENT IS CRITICAL: A professional alignment must be performed before driving this vehicle at highway speeds. Do not attempt to drive your vehicle after this install without having the alignment readjusted to factory specs.
    • IMPORTANT : Make sure the hose does not touch anything. If needed, rotate the reservoir in the bracket to clear the hose.

    • ALIGNMENT IS CRITICAL: A professional alignment must be performed before driving this vehicle at highway speeds. Do not attempt to drive your vehicle after this install without having the alignment readjusted to factory specs.

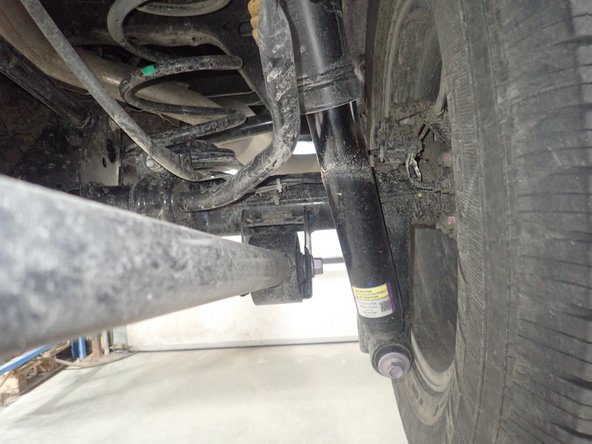
  8. Remove upper and lower bolts from OEM shocks. Keep OEM lower bolts to install Elka shocks. Remove upper and lower bolts from OEM shocks. Keep OEM lower bolts to install Elka shocks.
    • Remove upper and lower bolts from OEM shocks. Keep OEM lower bolts to install Elka shocks.

  9. Remove the plastic caps as shown by the red arrow on both sides. Use the supplied hardware to hold the bracket with the hole in the  frame reveal by removing the plastic cap.
    • Remove the plastic caps as shown by the red arrow on both sides.

    • Use the supplied hardware to hold the bracket with the hole in the frame reveal by removing the plastic cap.

    • Follow the same step as for the front. It is the same hardware as the front bracket holder.

    • Right side shown

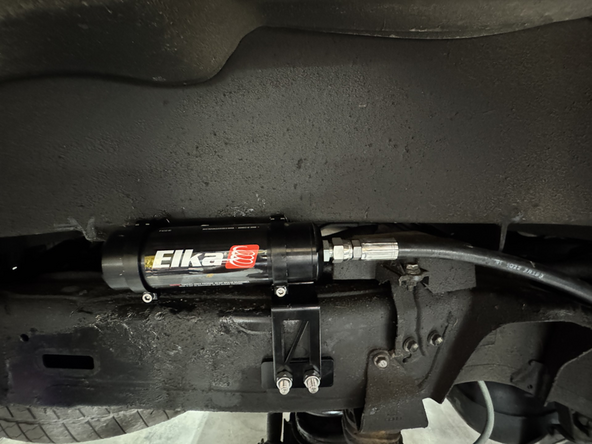
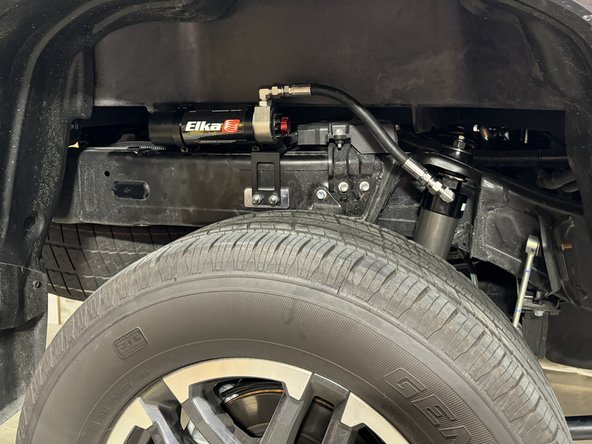
  10. Install rear shocks with the reservoir facing the rear of the truck on both side. Install lower bolt first without tighten it now.
    • Install rear shocks with the reservoir facing the rear of the truck on both side.

    • Install lower bolt first without tighten it now.

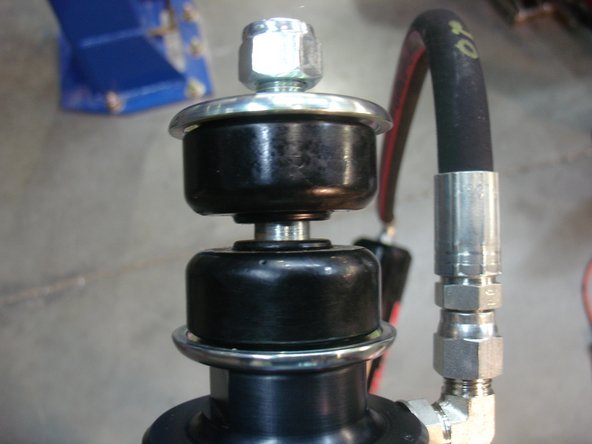
    • Compress shock, and install upper mount of the Elka shocks. Must have 1 isolator under and 1 over the shocks mounting. Don't tighten the nut.

    • Right side shown

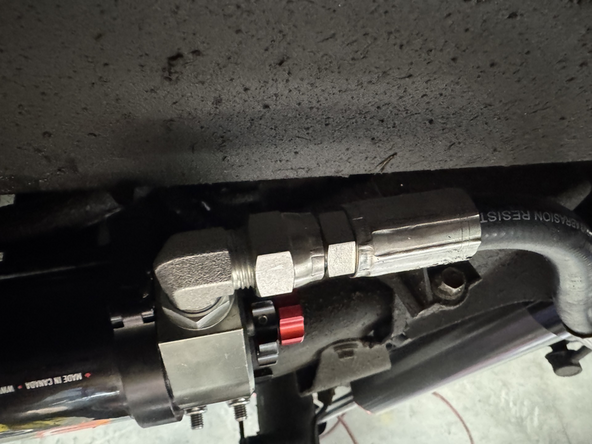
  11. Install the reservoir in the the bracket. When the reservoir is placed properly,  torque bracket's bolts at 10 Ft-Lb. Ensure hose is closer possible to the frame and is not overbend or twisted. Note that the shock can be rotated to point hose fiting closer to the frame. Torque upper and lower bolt.
    • Install the reservoir in the the bracket. When the reservoir is placed properly, torque bracket's bolts at 10 Ft-Lb.

    • Ensure hose is closer possible to the frame and is not overbend or twisted. Note that the shock can be rotated to point hose fiting closer to the frame.

    • Torque upper and lower bolt.

Finish Line
Laurent Metivier

Member since: 06/07/2023

1 Reputation

10 Guides authored

0 Comments

Add Comment

View Statistics:

Past 24 Hours: 0

Past 7 Days: 0

Past 30 Days: 6

All Time: 10

Elka Suspension Inc.

1585-M, De Coulomb
Boucherville (Quebec)
Canada J4B 8J7

Toll-Free (US & Canada):
1-800-557-0552

Direct Phone:
+1-450-655-4855