-
-
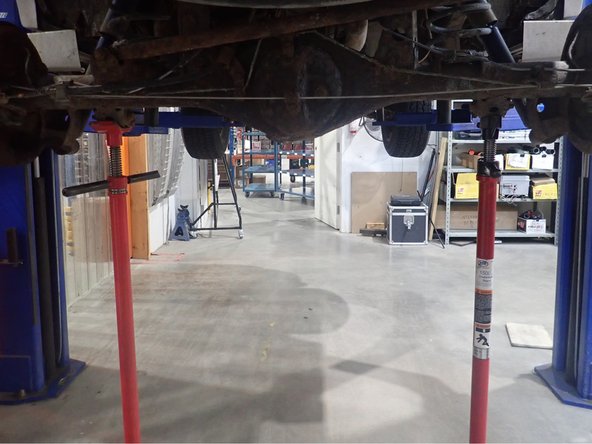
Lift the vehicle off the ground, then remove front tires.
-
Remove sway-bar link on both sides to allow lowers arms to temporary move separately.
-
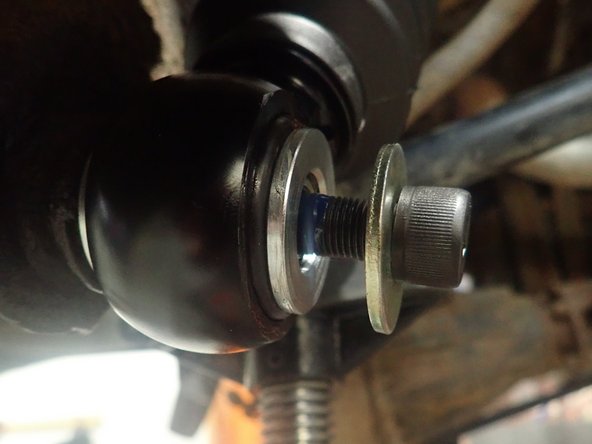
Separate upper control arms from steering knuckles.
-
-
-
Remove lower shock bolts, then remove upper nuts to remove oem shocks.
-
ELKA SHOCKS WITHOUT RESERVOIR:
-
Install new Elka shocks using oem lower bolts and provided upper bolts.
-
Torque 3 upper bolts at 35 ft/lb, and lower bolt at 80 ft/lb.
-
-
-
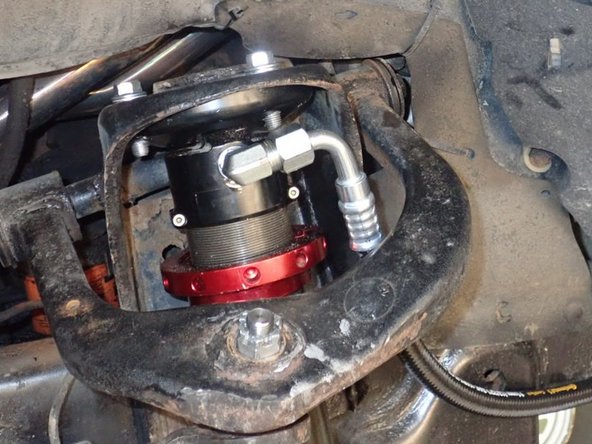
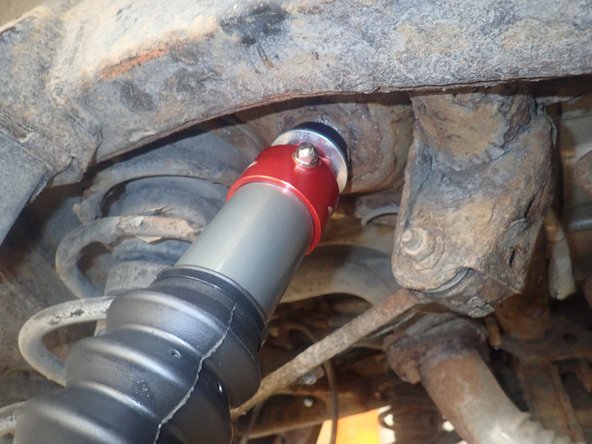
ELKA SHOCKS WITH RESERVOIRS:
-
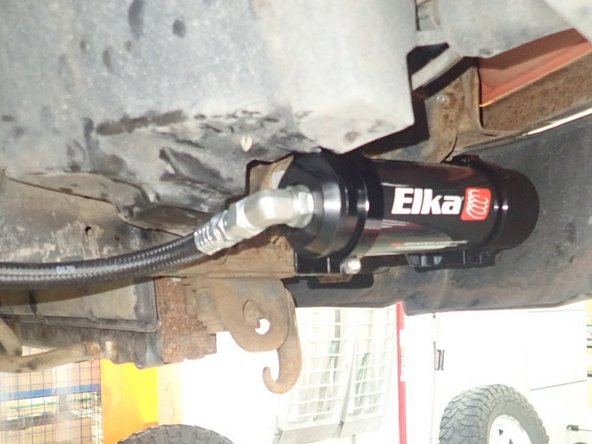
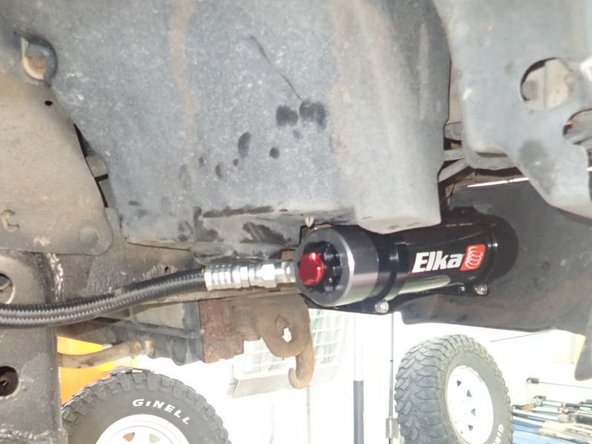
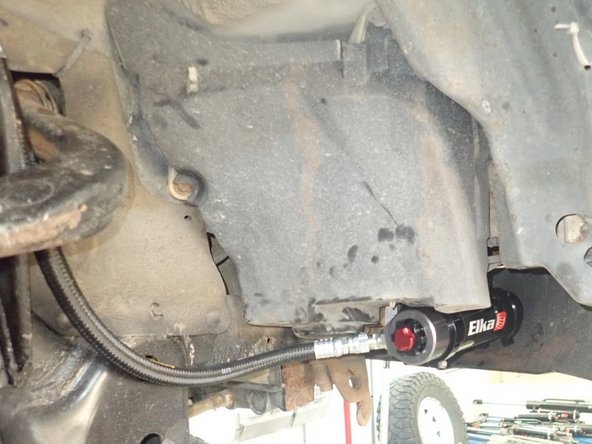
Install new Elka shocks using oem lower bolts and provided upper bolts. Hoses must face front of vehicle as shown (right side shown).
-
Torque 3 upper bolts at 35 ft/lb, and lower bolt at 80 ft/lb.
-
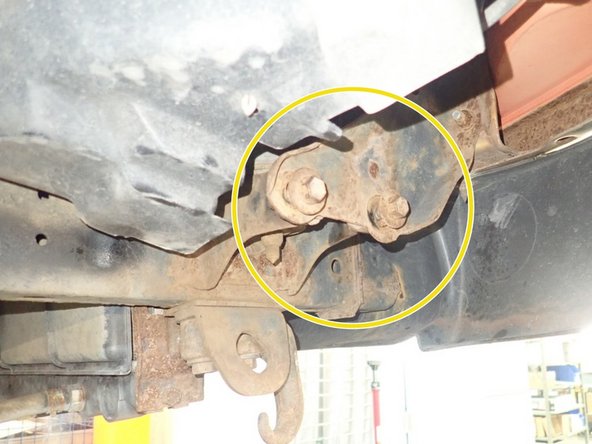
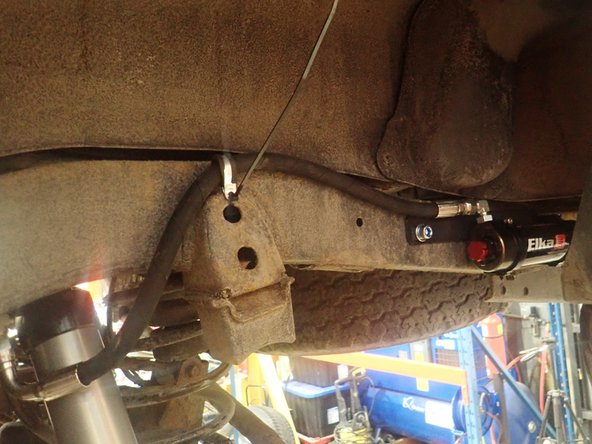
Remove bumper's bracket bolts showed by yellow circle, then fix supplied rectangular spacer first with provided bolts as shown. torque bolts at 40 ft/lb.
-
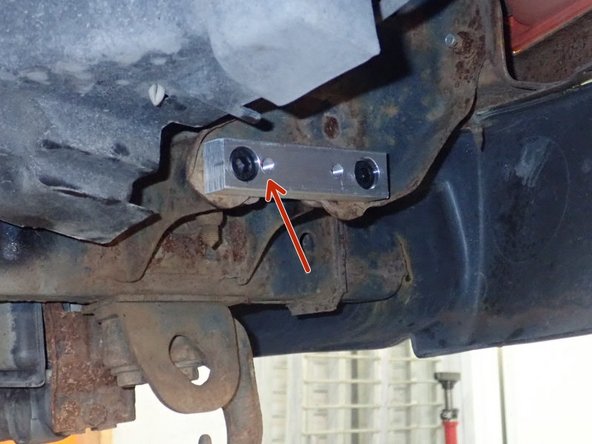
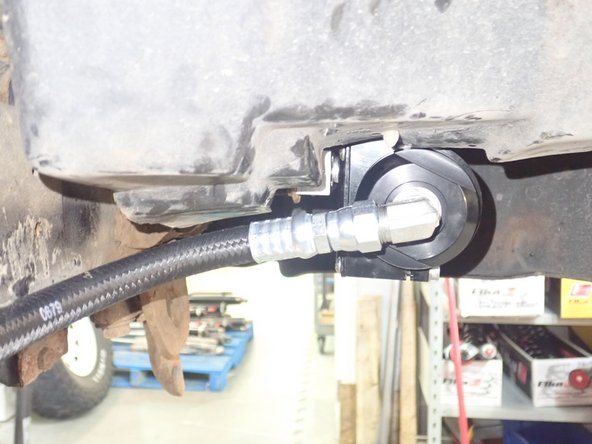
IMPORTANT: The threaded hole closest to the rectangular spacer holding bolt showed by red Arrow must face the shocks (right side shown)
-
-
-
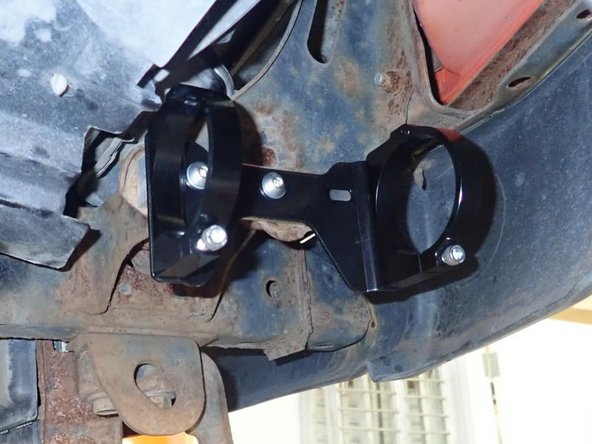
Using provided bolts and washers, fix reservoir holding bracket assembly into rectangular spacer as shown.
-
We recommend using threads locker and a torque of 20 ft/lb.
-
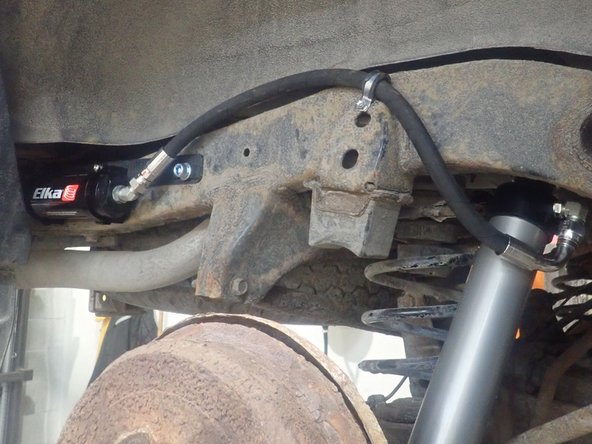
Sit reservoir into bracket's clamps, then place the reservoir in a way to place hose properly. BE CAREFUL TO NOT OVERBEND THE HOSE
-
-
-
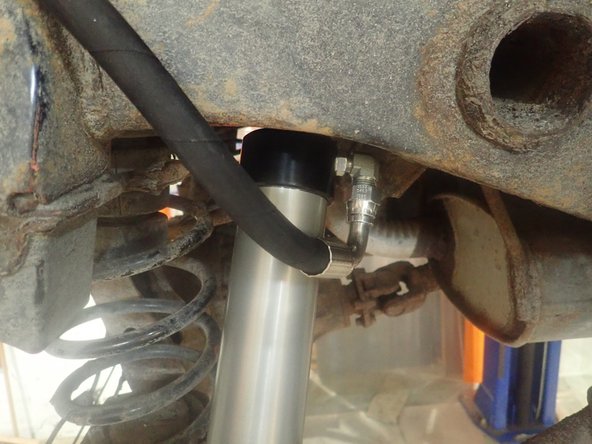
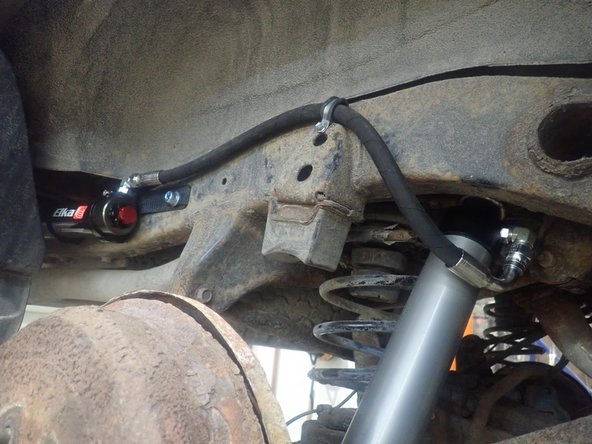
Reservoir's hoses must follow the frame as shown. When réservoirs are properly oriented, use threads locker on clamps bolts and torque them at 10 ft/lb.
-
ALIGNMENT IS CRITICAL: A professional alignment must be performed before driving this vehicle at highway speeds. Do not attempt to drive your vehicle after this install without having the alignment readjusted to factory specs.
-
-
-
Using an underhoist stand or a jack, support rear axle before removing oem shocks. Remove oem shocks and all oem hardware.
-
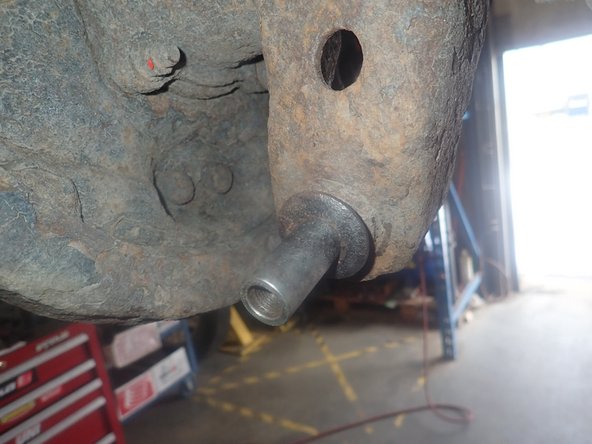
Clean lower studs from rust if needed, and apply small amount of grease or anti-seize on it.
-
-
-
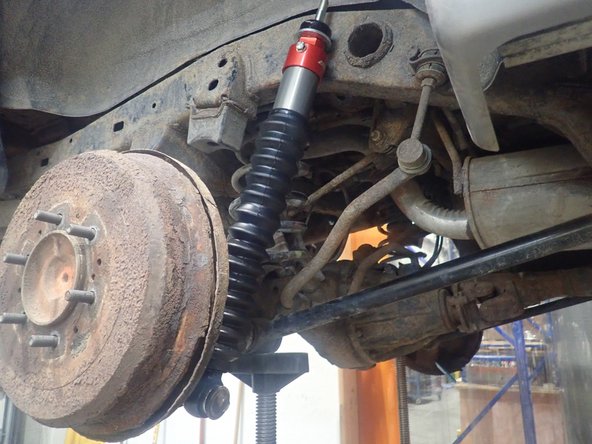
Place Elka shock head up as shown, then slide lower eyelet on oem lower shaft.
-
Use supplied longer bolt and washer to fix lower eyelet. Apply thread locker on bolt's threads then torque it at 60 Ft-Lb.
-
On the shock upper mount, remove nut, first washer and first isolator. Apply supplied white grease on top of upper isolators.
-
Holding the head or the body firmly, compress shock and align upper stud in frame's hole.
-
Add second isolator and washer on upper stud, then torque nut at 30 Ft-Lb.
-
-
-
ELKA SHOCKS WITH RESERVOIR:
-
Install shocks so as to direct the hose fitting toward front of vehicle, and hose outside of frame. ( Right side shown).
-
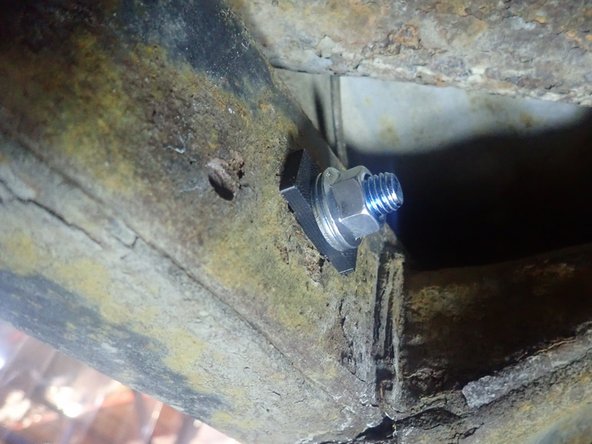
Use proper bracket assembly (right side shown). Pass bolt into first aluminium square spacer, then pass it through bracket square hole.
-
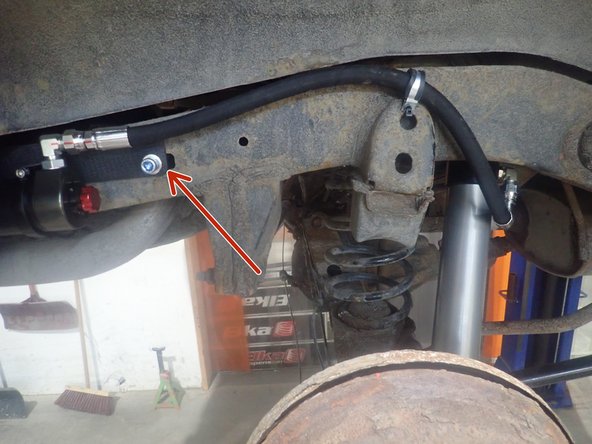
Install reservoir bracket using the square holes showed by red arrow.
-
-
-
Use second aluminium square spacer inside of frame, then install supplied washer and nut. Apply threads locker, then torque nut at 40 Ft-Lb.
-
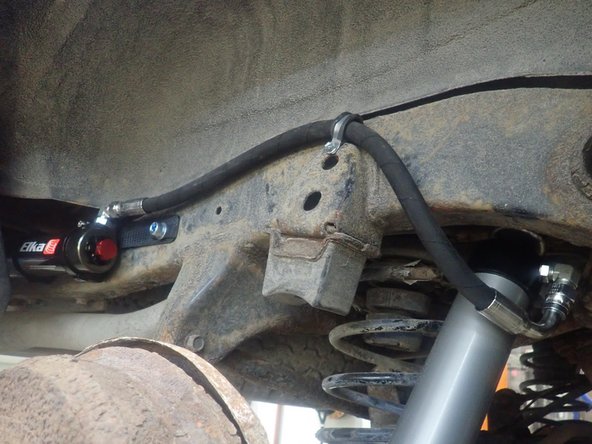
Sit reservoir into bracket's clamps, then place the reservoir in a way to place hose properly. The shock can be turned to align hose as shown. (right side shown).
-
When reservoir is placed properly, apply threads locker on clamp's bolts and torque them at 10 Ft-Lb.
-
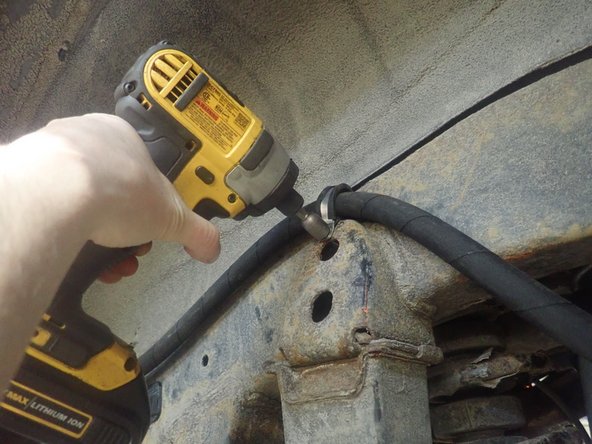
Use hose clamp and self-tapping screw to fix hose as shown.
-
The hose must be closer as frame possible, without touching it.
-
-
-
FINAL INSTALLATION PICTURES:
-
ALIGNMENT IS CRITICAL: A professional alignment must be performed before driving this vehicle at highway speeds. Do not attempt to drive your vehicle after this install without having the alignment readjusted to factory specs.
-