Introduction
IMPORTANT NOTES, READ BEFORE INSTALLATION
- Never unscrew the banjo bolts on the hoses to reorient them
- Do not bend the hoses at a 90° angle
- Do not route the hoses near a place where it can become clogged
- Do not route the hoses near extreme heat generating parts (ie: exhaust)
- Do not over tighten the metal collars on the reservoirs (torque to 6 lb.in)
- Make sure reservoir stays clear form any moving parts (ie: swingarm, chain)
- Hoses must be secured to the frame using zip ties to avoid contact with moving parts
- Make sure that the shock bolts and metal collars are fastened properly before riding
-
-
Unscrew the bolt on top of the strutt using a 3/4” key while holding the shaft of the strutt with a 3/8” key.
-
Repeat the procedure to unscrew the lower bolt while holding the shaft through the mounting point.
-
Now completely remove the nut bushings and the spring retaining clip from the strutt’s shaft. Be very careful when removing the nut as the spring is under pressure.
-
-
-
Loosen the locking bolts that holds the strutt inside the Macpherson leg.
-
There are 2 bolts to remove that are indicated by the arrows on the picture.
-
Holding the spring, grab the strutt and push it up to get it out of the Macpherson leg.
-
-
-
Remove the strutt from the Macpherson leg while holding the spring in place.
-
Secure the strutt in a vise and remove the spring.
-
-
-
Install the Elka Suspension clip/preload assembly over the strutt. Be careful not to damage the strutt’s shaft. Install the Elka smaller spring over the clip/preload assembly. Install the crossover spacer and then the main Elka spring.
-
Slide the strutt’s shaft through the top mounting hole to reinstall the strutt back in place on the vehicle.
-
Slide up the strutt to be able to put it back into the Macpherson leg. Make sure you slide the strutt all the way into the leg.
-
-
-
Once again, make sure the strutt is completely pushed into the Macpherson leg. Tighten back the retaining bolts on the Macpherson leg to secure the strutt in place. Refer to your vehicle’s owner manual for torque tables.
-
Re-install the top retaining clip, bushings and bolts. The picture shows the exact order.
-
Tighten the top nut while holding the shaft of the strutt through the mounting hole.
-
-
-
Tighten the upper mounting nut while holding the strutt’s shaft with a 3/8” key. The installation procedure is now completed. The picture on the right shows where the preload adjustment ring is located. Turn to the left to increase the preload or to the right to decrease the preload.
-
-
-
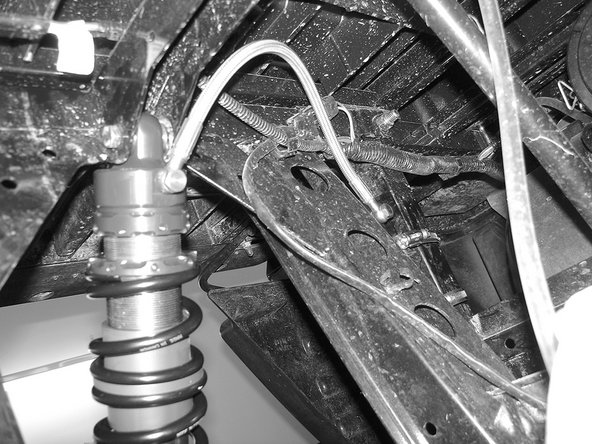
Banjo bolts must face towards the front of the vehicle with their attachement point towards the inside.
-
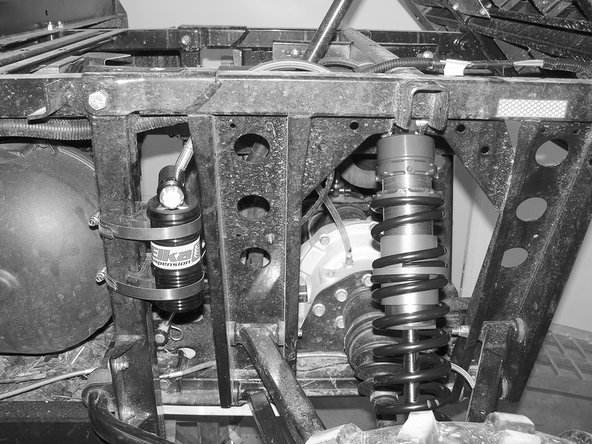
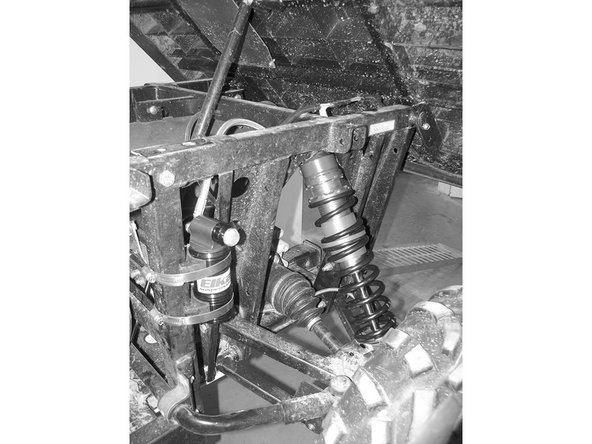
Reservoirs must be attached to the rear subframe using the provided rubber holders and metal collars. Make sure to route the hoses according to the pictures. You will need to attach the hose to the frame using zip ties.
-
The compression adjustment knobs should be facing the sides of the vehicle for convenient access.
-
The rebound adjuster (compact model) located at the bottom of the shock should face the outside of the quad for convenient access. The bottom eyelet of the shock can be turned 180° clockwise if needed.
-


