-
-
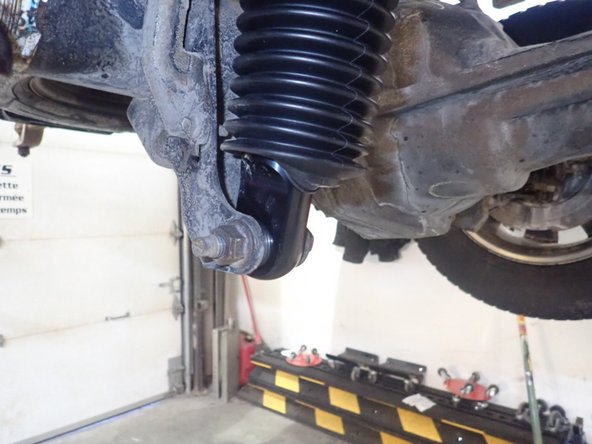
Lift the vehicle using a jack or stand so that the front shocks are in fully extend position WITHOUT TAKING WHEELS OF THE GROUND or HOLDING AXLE WITH STAND The shocks hold the front axle, so be sure the axle can't fall before removing front shocks.
-
Remove upper nuts and lower bolts, then remove OEM shocks.
-
-
-
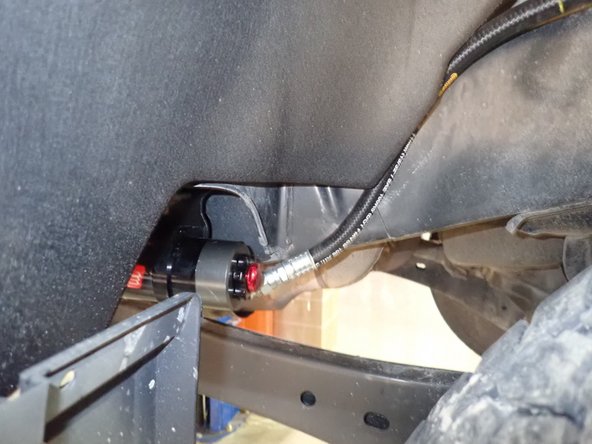
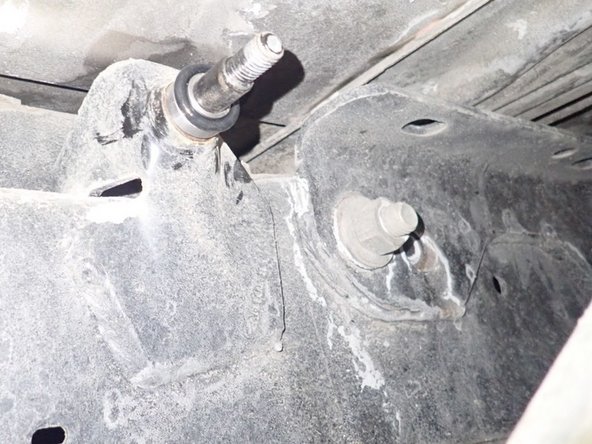
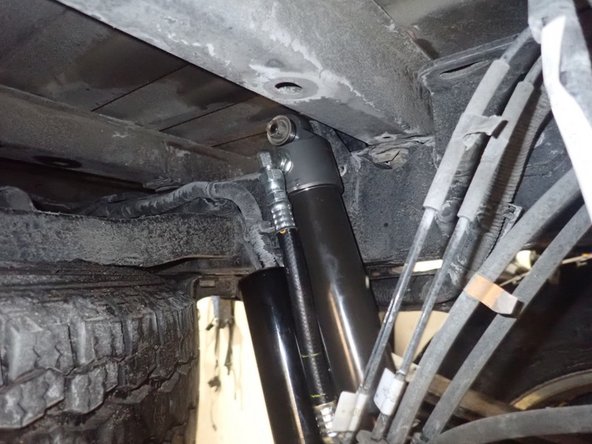
To install front reservoir brackets, remove the nuts showed by red arrows near the cab rubber support.
-
In order to install brackets: Slide provided spacers showed by green arrows on studs, put bracket in place and re-install OEM nuts with threads locker.
-
Make sure having no interferences from bracket vs frame before torquing nuts. RIGHT SIDE SHOWN
-
-
-
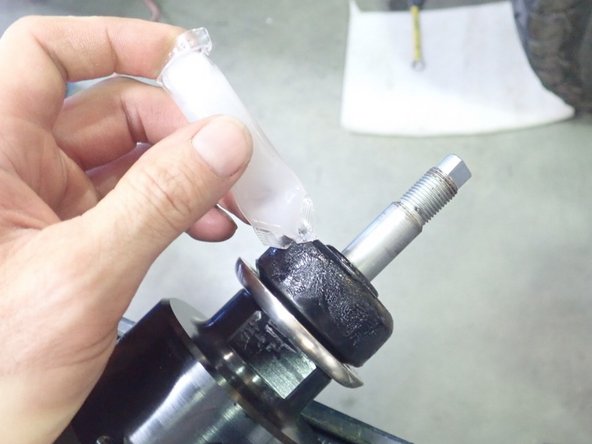
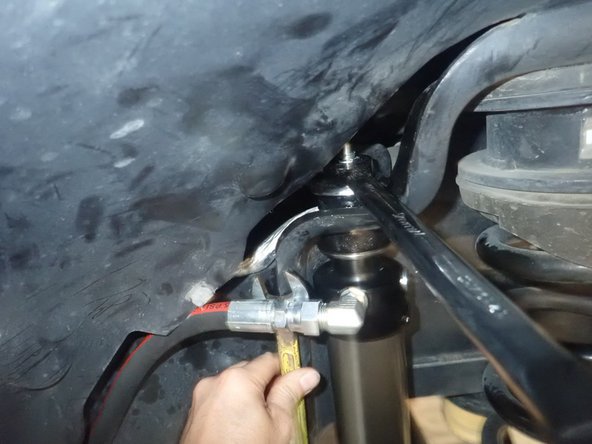
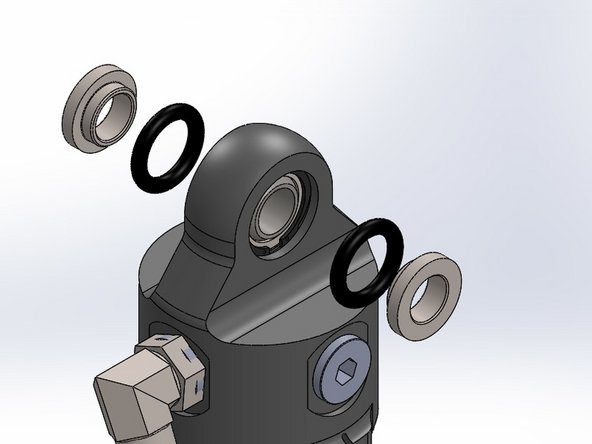
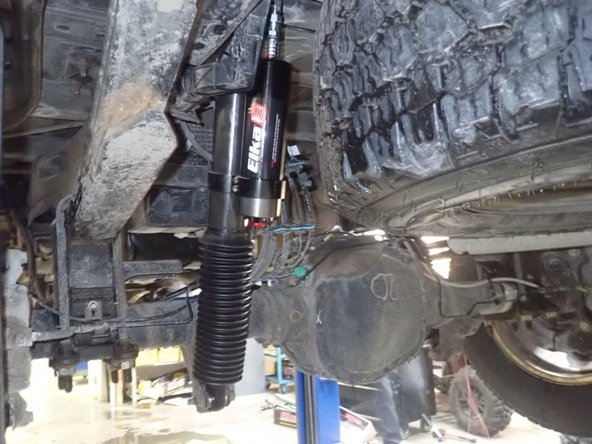
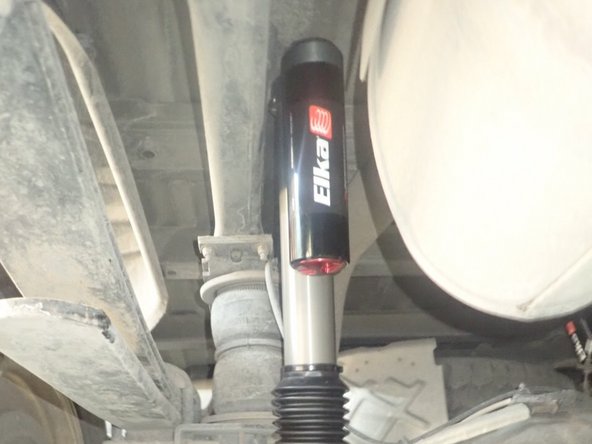
Apply provided grease on Elka upper bushings.
-
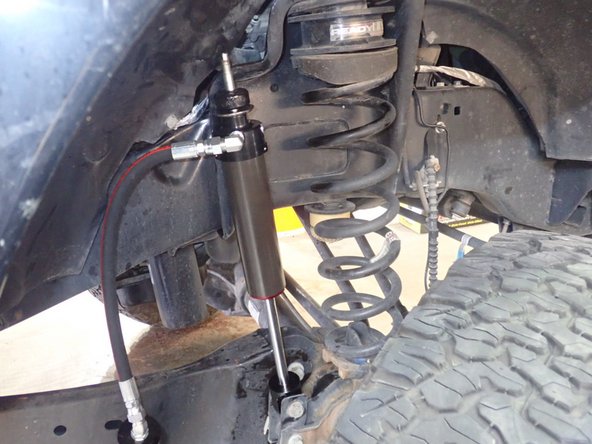
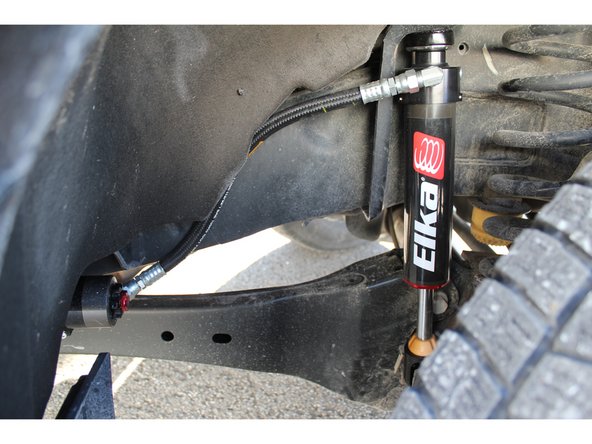
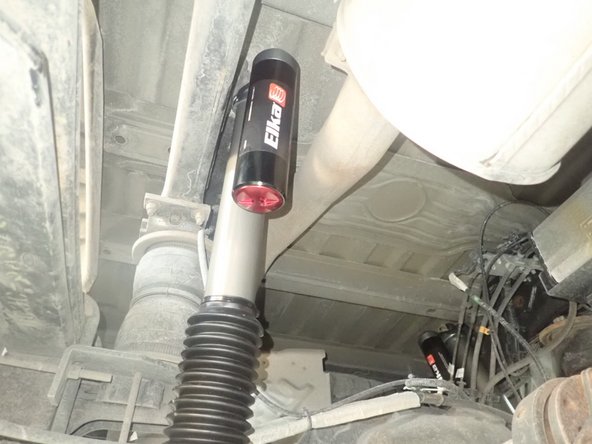
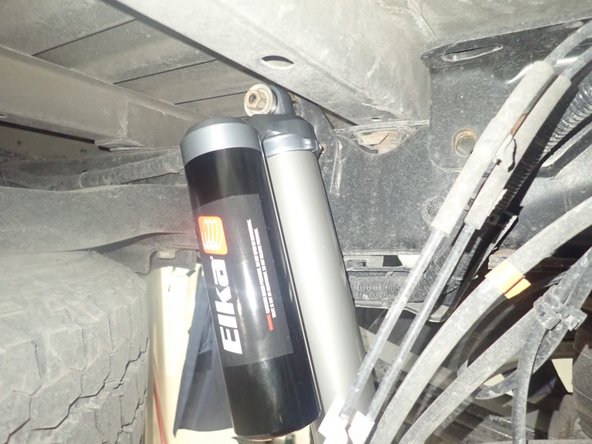
Install new Elka front shocks using lower OEM bolt first without thightening it. Make sure the hose is pointing the rear of vehicle. (Right side shown)
-
With only the lower rubber bushing on shock's stud, compress the shock and slide the upper stud in place.
-
Put the second rubber bushing and washer, then install provided nut without thightening it.
-
-
-
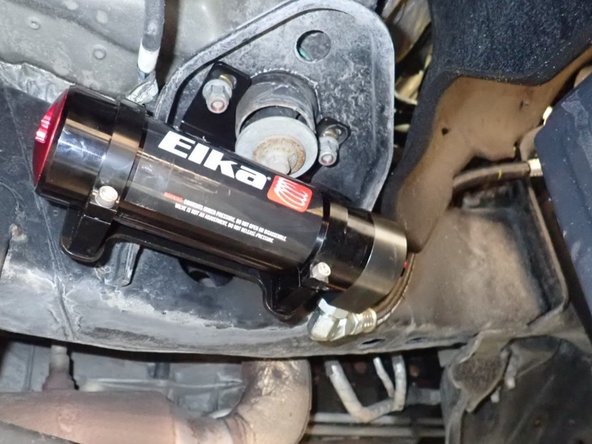
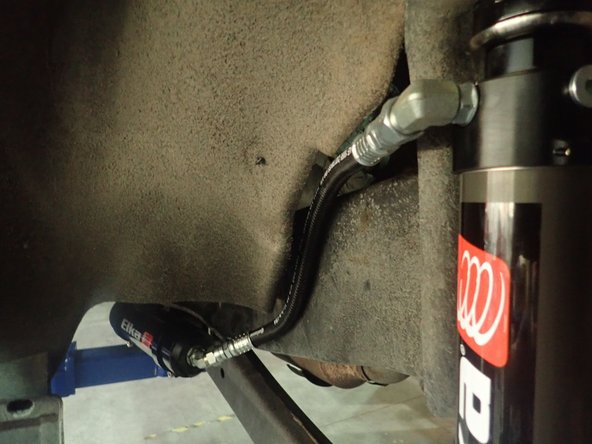
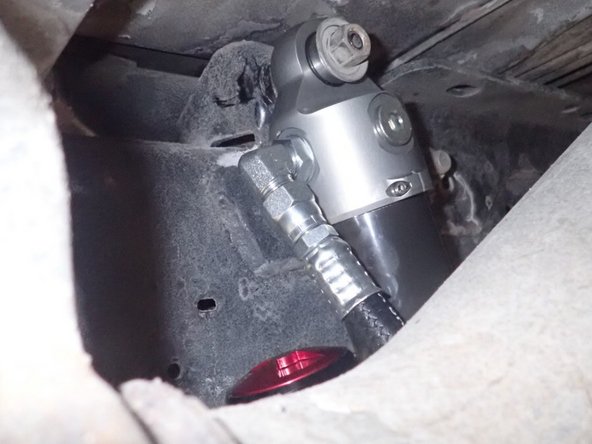
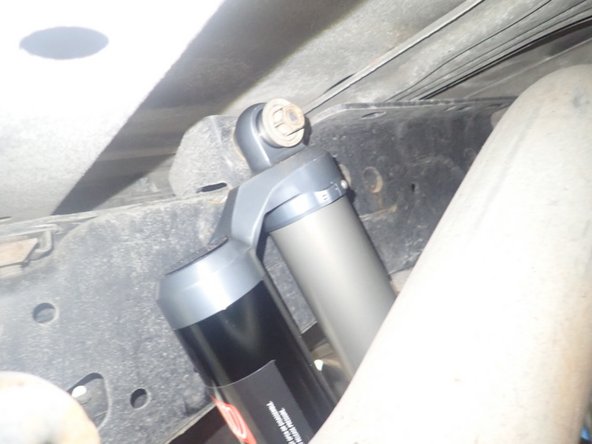
Sit the reservoir into bracket's clamps as shown. Place reservoir to have the hose close to the frame without interferences. (Right side shown)
-
Apply some threads locker ,then torque clamp's bolts at 10 lb/ft.
-
-
-
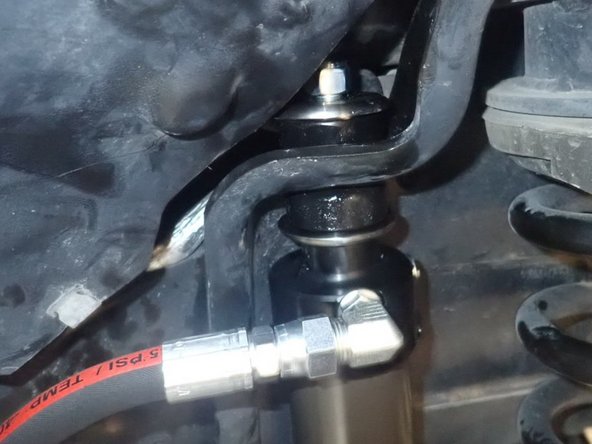
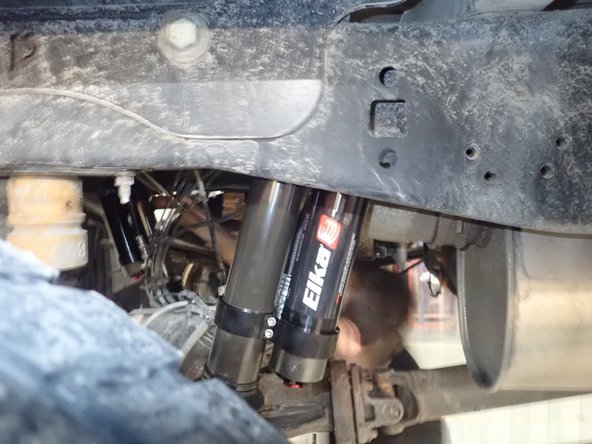
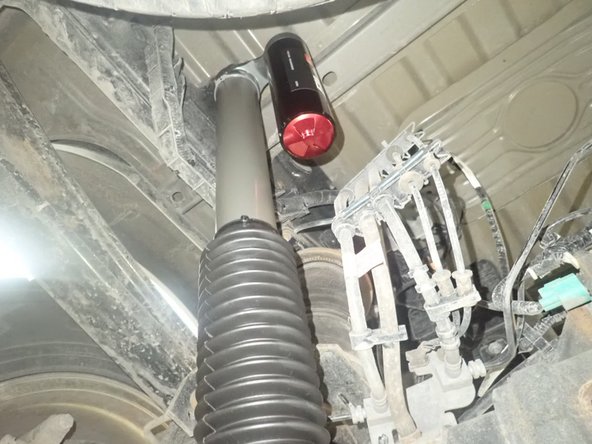
Turn shocks to have the hoses as close as possible to the frame, making sure avoid fittings interference, then tighten all bolts at OEM torque specs.
-
Before droping the vehicule, make sure coil springs are aligning well at their position.
-
-
-
FOR REAR ADJUSTABLE SHOCKS WITH HOSE:
-
Lift the vehicle using a jack or stand so that the wheels are off the ground. Remove OEM shocks. Keep your original bolts to re-use when installing your new Elka shocks.
-
Slide 1 provided upper mount spacer and o-ring on frame's upper stud.
-
-
-
ON REAR RIGHT SIDE:
-
Slide head of rear right Elka shocks on upper stud making sure reservoir is facing the front of vehicle.
-
Slide second o-ring, then second provided spacer on stud. Install OEM nut on stud and torque it at OEM specs.
-
Push the lower shock end to compress the shock, then install lower bolt. Torque the bolt at OEM specs.
-
Make sure having no interferences between reservoir and truck's frame or exhaust. You can loosen clamp's bolts and redirect reservoir if needed.
-
-
-
ON REAR LEFT SIDE:
-
Follow same procedure for rear left side.
-
Make sure shock's head hose fitting is facing Inside the vehicle and the reservoir is facing rear of vehicle.
-
-
-
FOR REAR NON-ADJUSTABLE PIGGYBACK SHOCKS:
-
Follow the previous steps as for adjustable shocks.
-
ON REAR RIGHT SIDE: Install the rear right shock with the reservoir facing the front of vehicle as shown.
-
-
-
ON REAR LEFT SIDE: install shock with reservoir facing Inside the vehicle as shown.
-