-
-
Lift the vehicle off the ground, then remove front tires.
-
Remove sway-bar link on both sides to allow lowers arms to temporary move separately.
-
-
-
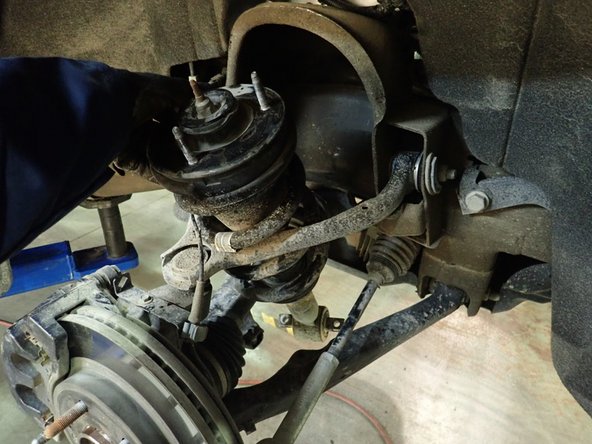
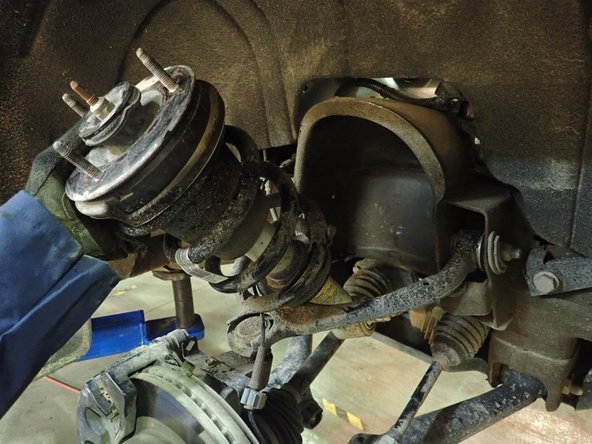
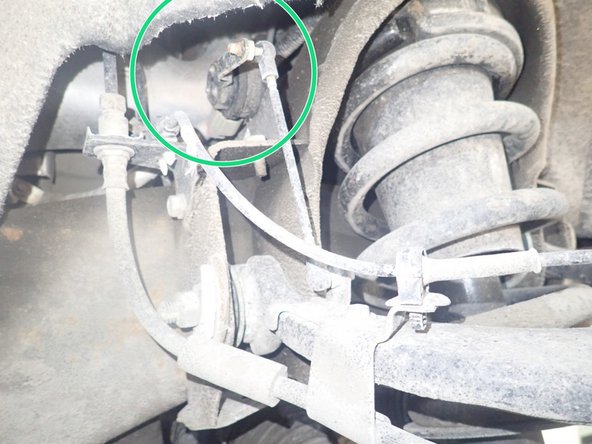
Remove plastic caps on upper studs, then unscrew the 3 upper nuts.
-
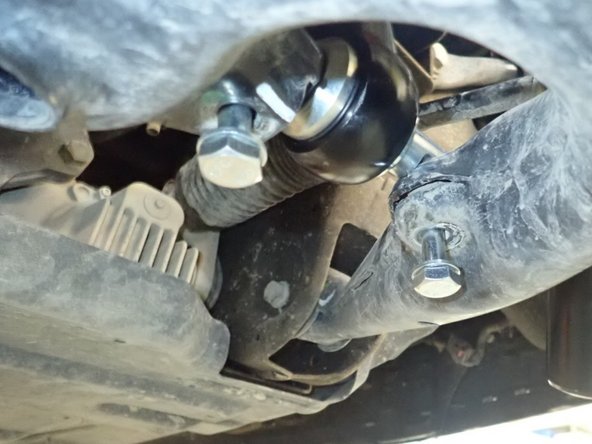
Remove lower shock bolts.
-
-
-
To remove OEM shocks: push the bottom of shocks rearward, lower the shocks to clear frame upper mount, then take out the shocks from above the upper mount.
-
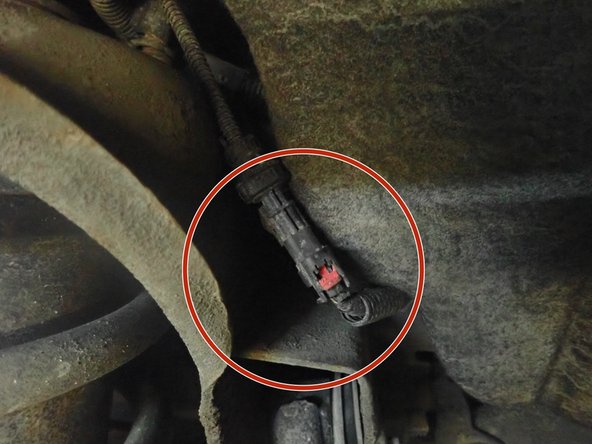
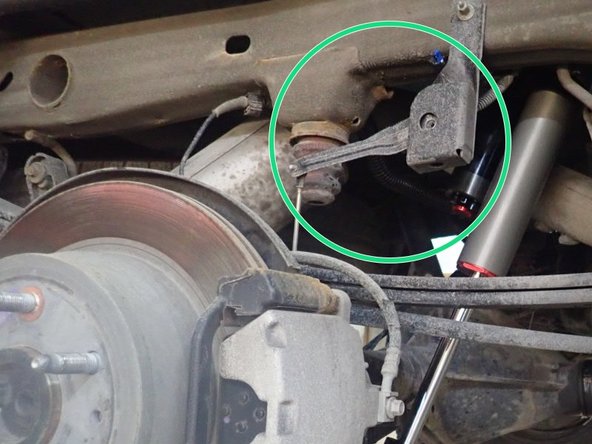
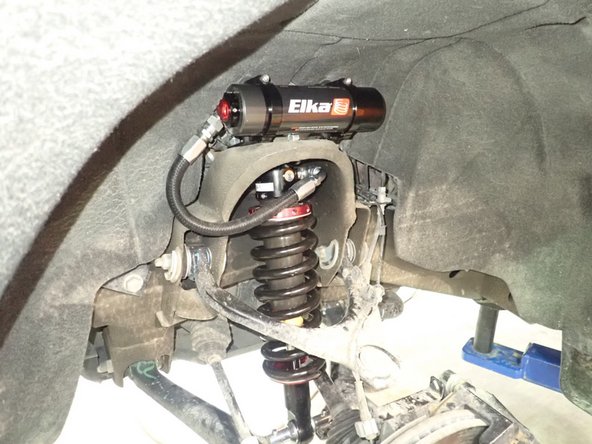
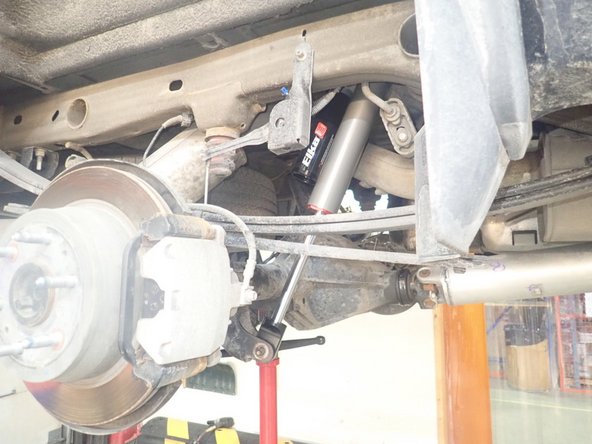
ON DENALI AND ESCALADE MODELS (With Magneride system): Before removing shocks, you have to disconnect electric connectors (showed by red Arrow) situated on top of shocks.
-
DO NOT TURN ON IGNITION BEFORE INSTALLING PROVIDED BYPASS MODULES TO AVOID ERROR MESSAGES ON THE DRIVER INFORMATION CENTER.
-
-
-
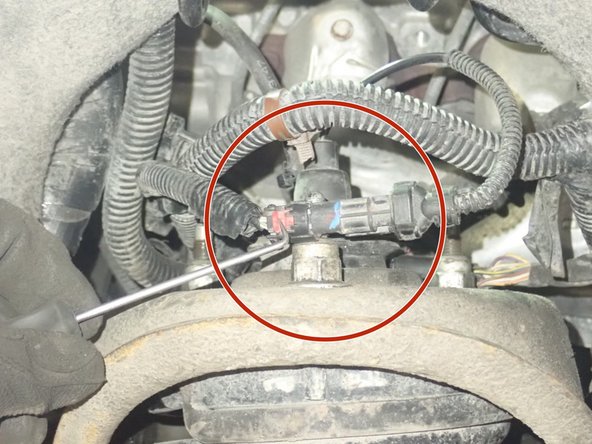
ON DENALI AND ESCALADE MODELS (With Magneride system):
-
All provided modules MUST be installed to bypass the magnetic shocks (showed by red circle) AND ride height sensor (showed by green Arrow) situated on upper arms at the front and close to leaf springs at the rear. The vehicle will not show any check engine lights or impose any speed limiters with these modules.
-
Each corner being bypassed will get one ride height sensor simulator (3 pins) AND one shock simulator (2pins)
-
FULLY SEAT THE CONNECTORS, The connector seals are thight, be sure to completely seat the simulator modules (you will hear a click).
-
-
-
ESCALADE AND OTHERS PARTICULAR MODEL/YEARS:
-
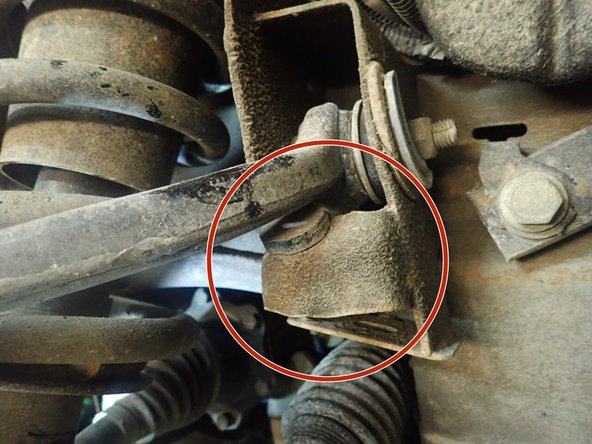
Elka front shocks are longer than oem shocks and may need to cut and remove upper arm stopper as shown to be able to drop lower suspension arm to be able to fit longer shocks.
-
-
-
To install your new Elka shocks, do the inverse procedure showed on step 3. Shock reservoirs must face to the front of vehicle. You may have to push lower suspension arm to put the shocks in place.
-
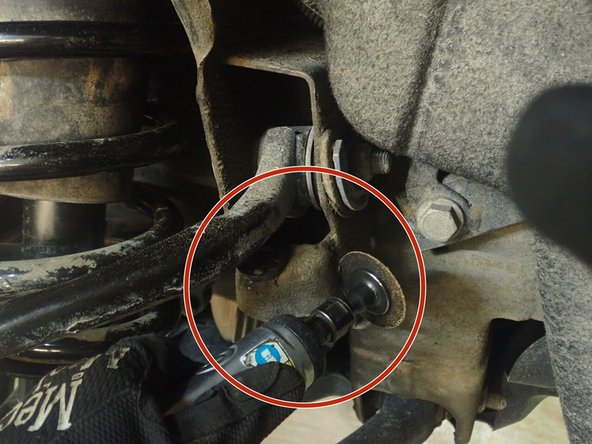
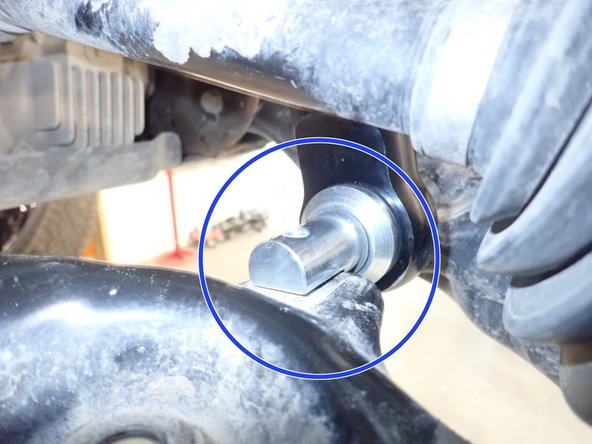
Be sure the lower mount's flats are facing lower arm as shown by blue circle. You can turn the lower pin if needed.
-
Start installation with the provided lower bolts and washers. Apply threads locker on bolts, then torque them at 60 ft.lb.
-
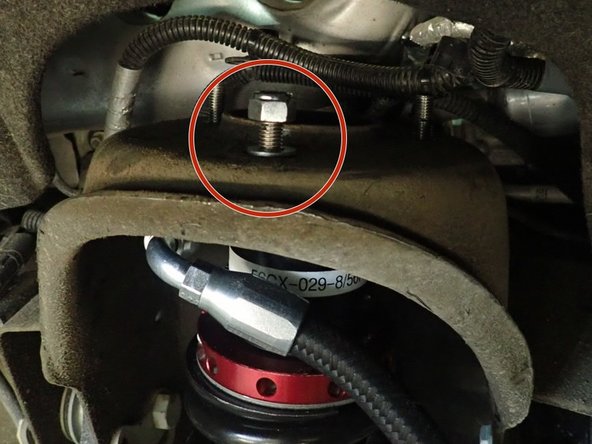
At the top, first install central nut and washer (showed by red circle) then torque it at 35 ft.lb.
-
-
-
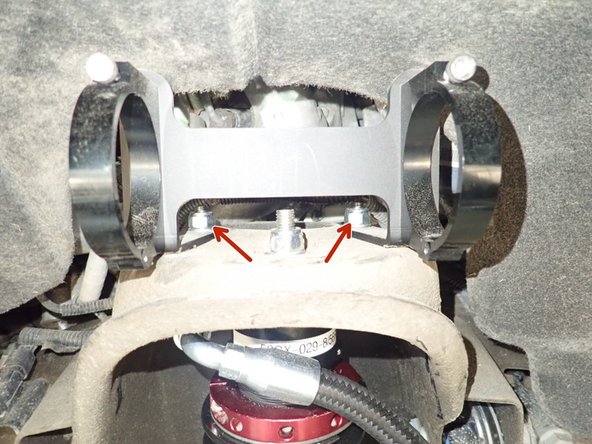
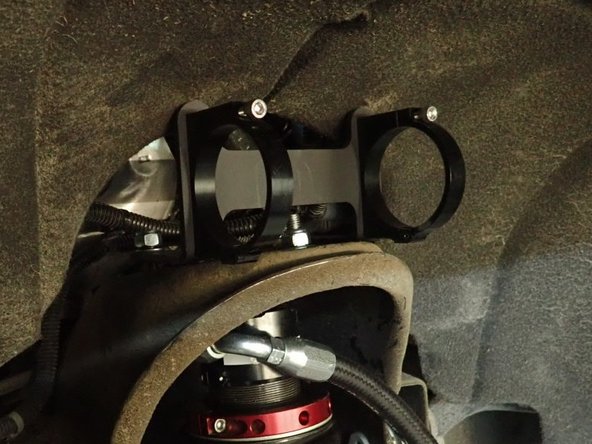
Reservoir bracket must be slide in the 2 rear studs (showed by red Arrow). You may have to push or cut fender guard to allow space for bracket.
-
Install washer and nut on studs and torque them at 35 ft.lb.
-
-
-
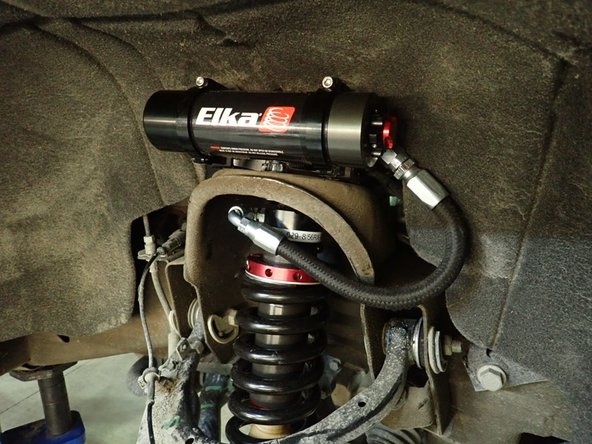
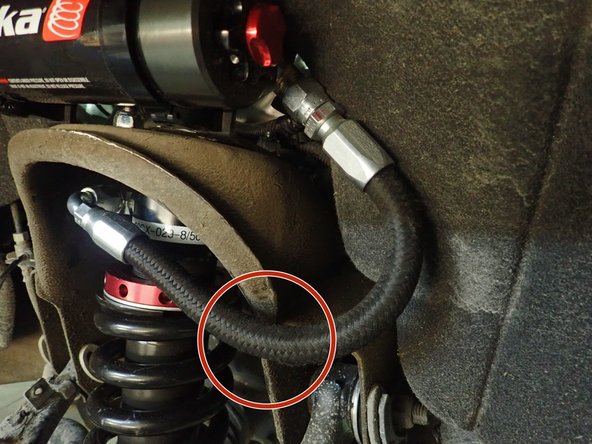
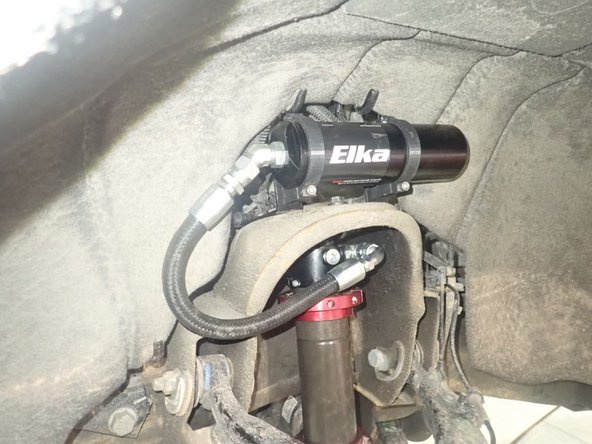
Sit reservoir into bracket's clamps, then place the reservoir in a way to place reservoir fitting and hoses as close to the fender guard as possible. BE CAREFUL TO NOT OVERBEND THE HOSE OR MAKE THE HOSE RUBBING ON UPPER SHOCK MOUNT IN THE AREA SHOWED BY RED CIRCLE.
-
When reservoir is placed properly, apply threads locker on clamp's bolts and torque them at 10 ft.lb.
-
Right side shown
-
-
-
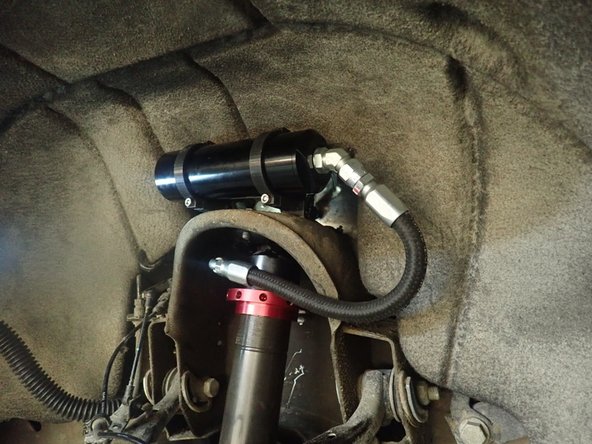
Left side shown.
-
To complete front installation, put back sway-bar links and wheels.
-
ALIGNMENT IS CRITICAL: A professional alignment must be performed before driving this vehicle at highway speeds. Do not attempt to drive your vehicle after this install without having the alignment readjusted to factory specs.
-
-
-
Remove upper and lower bolts from OEM shocks. Keep OEM bolts to install Elka shocks.
-
ON DENALI MODELS (With Magneride system): Before removing shocks, you have to disconnect electric connectors situated on top of shocks. Don't forget to install bypass modules like front shocks.
-
ADJUSTABLE SHOCKS MODEL:
-
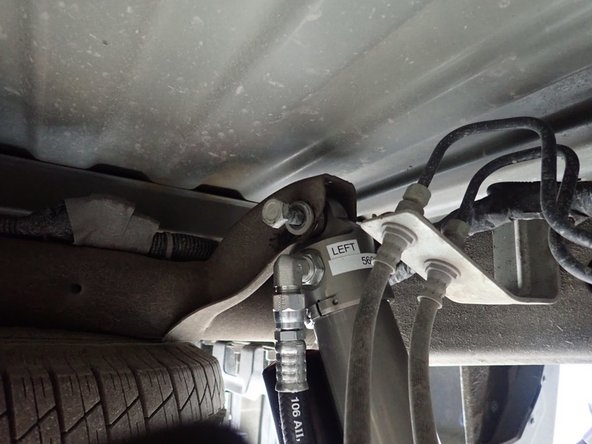
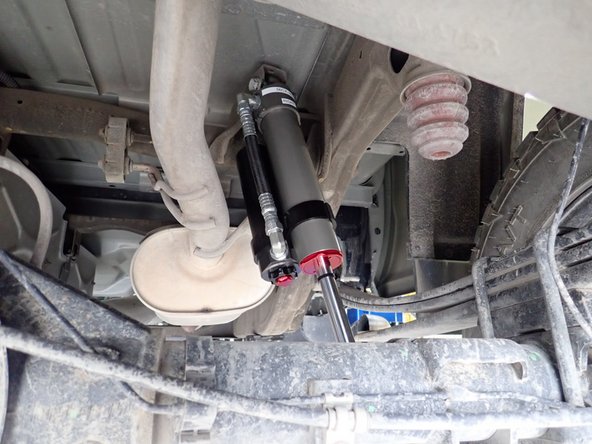
LEFT SIDE; Install rear left shock with head to the top and the reservoir facing the rear of vehicle as shown.
-
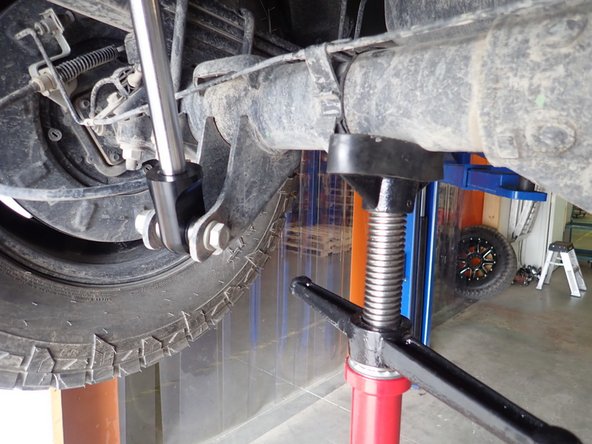
Using an underhoist stand or a jack, lift rear axle to be able to install lower bolt.
-
-
-
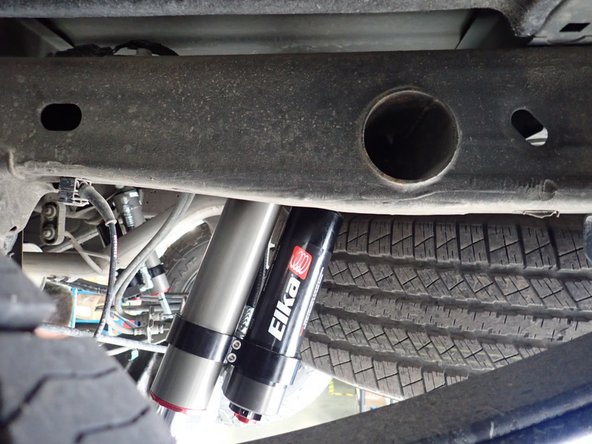
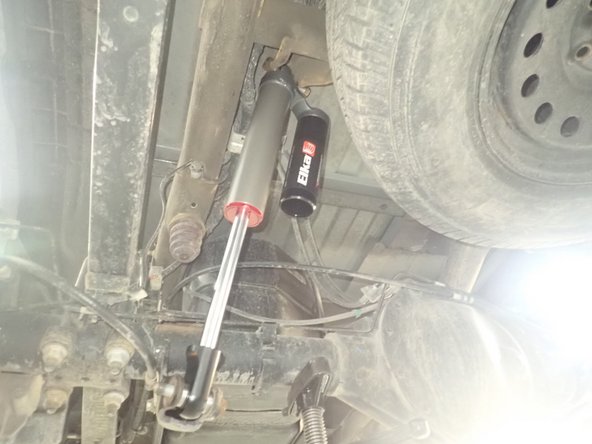
RIGHT SIDE: Install rear right shock with head to the top and reservoir facing front of vehicle as shown.
-
Do the same things as previous step for lower mount.
-
Torque all bolts as manufacturer's specs.
-
-
-
NON-ADJUSTABLE SHOCKS MODELS;
-
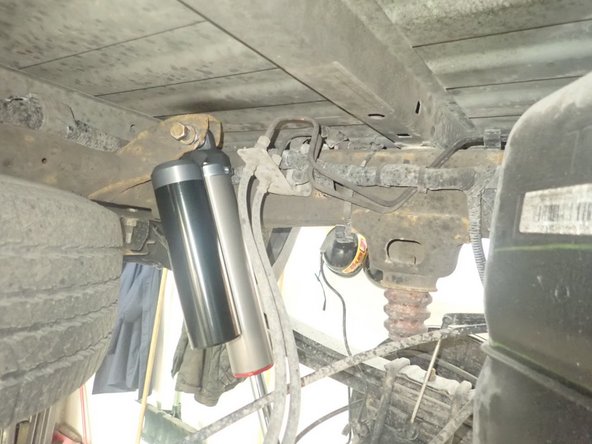
LEFT SIDE: Install rear left shock with the head to the top and the reservoir facing Inside the vehicle as shown.
-
Using an underhoist stand or a jack, lift rear axle to be able to install lower bolt.
-
-
-
RIGHT SIDE: Install rear right shock with the head to the top and the reservoir facing the rear of vehicle as shown.
-
Torque all bolts as manufacturer's specs.
-