-
-
Lift the vehicle using a jack or stand so that the wheels are off the ground. Refer to your vehicle's owner manual for specific instructions on how to remove the stock shocks. Keep your original bolts to re-use when installing your new Elka shocks.
-
-
-
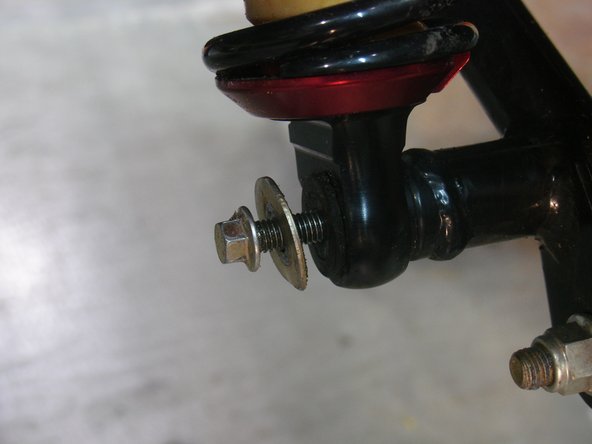
Install the front new Elka shocks with the reservoir ( on Stage 3-4-5 ) or Schraeder nitrogen valve ( on Stage 1-2 ) at the top of vehicle. ( left side shown ).
-
-
-
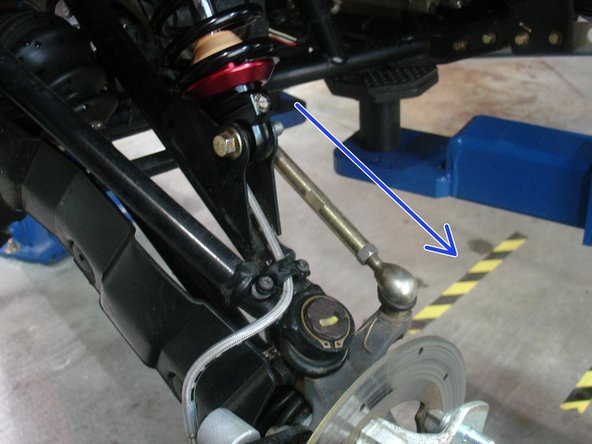
On Stage 2, Stage 4 and Stage 5 models, the lower shock eyelets should be installed with the rebound adjuster oriented towards the outside of the vehicle as shown by the blue Arrow on the photo ( left side shown ). If needed, you can turn the lower eyelet to orient properly.
-
-
-
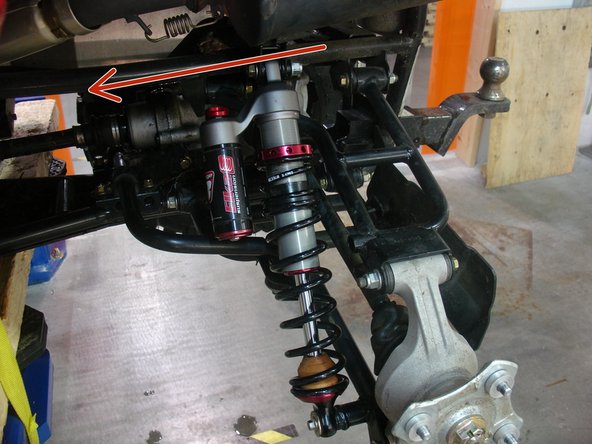
Install the new Elka rear shocks with the piggyback reservoir at the top and oriented towards the front of the vehicle''' as indicated by the red Arrow on the photo
-
For Stage 1 and Stage 2 shocks, install them with the shraedder valve facing the outside of vehicle.
-
Use the OEM steel spacer for lower mounting.
-
-
-
On Stage 2, Stage 4, and Stage 5 models the rebound adjuster located on lower eyelet of the shocks should be oriented towards the inside of the vehicle, as shown. (Left side shown ). If needed, you can turn the lower eyelet to orient properly.
-
Note: We highly recommend a tire pressure of ± 7 psi.
-